Tag: Alpha 1

  • Ashes of Creation Release Schedule (Updated)

    Ashes of Creation Release Schedule (Updated)

    The updated Ashes of Creation Apocalypse release schedule. Apocalypse will be made available to all registered users, including those without alpha/beta packages.

  • [Updated] Apocalypse Battle Royale Guide

    [Updated] Apocalypse Battle Royale Guide

    Apocalypse Battle Royale Guide & Tier List

    Last updated – September 25th 2019

    AoC Apocalypse BR Guide. The Ashes Post is proud to present our battle royale guide and tier list created for the ashes of creation community! The tier list spreadsheet includes detailed data on the weapon/armour types present in this game mode, while the battle royale guide will provide a fair amount of knowledge to players new to the genre. The contents of this guide will be constantly updated as Intrepid Studios makes changes to the game.

    Special thanks: Awace#3904 & Zii#2633 for data collection.

    You can find a direct link to the below spreadsheet here: https://goo.gl/GMsMtt


    Battle Royale Map

    Besides the general keybinds such as movement, there are a few specific keybinds that you need to know when playing:

    • RMB + LMB – Acrobatic Leap: While holding your right mouse button, pressing left mouse button will trigger your gap closer skill. Melee only.
    • Q – Weapon Ability: Pressing Q will activate the special ability on your currently selected weapon.
    • T – Drop Current Item: Pressing T will drop your currently selected weapon/equipment.
    • C – Chest Armour Ability: Pressing C will activate the special ability on the chest armour you have equipped.
    • V – Leg Armour Ability: Pressing V will activate the special ability on the leg armour you have equipped.
    • X – Dodge: Pressing X will let you dodge in the direction you are moving in.
    • F1 – Repair Armour: Holding down this key lets you repair your armour at the cost of mana.


    Battle Royale Match Flow

    At the beginning of every match, you will be placed in a training island while you wait for other players. Once all players  are done loading, the divine gateway will sucks you in, signalling the start of the game. You’ll find yourself stuck drifting  within a rift. For those of you familiar with other battle royale games, this rift carries all the players at the start of the  match and moves from one end of the map to the other (Similar to Fortnite’s battle bus or PUBG’s aircraft). Once you are  ready, press spacebar to leave the rift and mount your griffon. While on your griffon, you can press E to dismount,  however doing so from a high altitude will result in you taking fall damage. If you fail to manually leave the rift before it  reaches the end of the map, it will automatically force you onto your griffon. Once on your griffon, navigate through the  clouds to land at the location of your choice.

    Once the rift reaches the end of the map, the first corruption storm circle appears on your map.  Once you’ve landed, your  first priority is to acquire equipment (Weapons/Armour). This is something that you will get better at with experience as  learning equipment spawn locations is incredibly helpful in deciding which location you would like to land in while within  the rift. If you land near an enemy player, prioritise obtaining a weapon first as this will give you the upper hand to shut  them down quickly, giving you some breathing room to recover health/armour.

    Loot chests will have a humming/shimmering audio queue when you are close to one, so if you hear them, look around to get some sweet loot. When gearing up, look for equipment with a higher rarity to improve your damage output and survival. There are 3 rarities within the game as follows:

    • Uncommon: The lowest rarity of equipment. Weapons of this rarity deal the base amount of damage. 20 Armour per piece (Difference in damage is minimal)
    • Rare: The medium rarity of equipment. Weapons of this rarity deal more than the base damage. 35 Armour per piece (1-3 increased damage than Uncommon)
    • Legendary: The highest rarity of equipment. Weapons of this rarity deal the most amount of damage. 50 Armour per piece (1-3 increased damage than Rare)

    There are two types of potions (Fort/Mount potions removed): Health & Mana

    • Health Potion: Take 5 seconds to consume and restores 25/100 health depending on the rarity of the potion. Capped at 100 health.
    • Mana Potion: Consumed instantly once you pick them up. Mana is used in firing magic/arrows to repairing armour durability. Capped at 1000 mana.
    • Mounts: Can be acquired by walking up to a horse and pressing E. After a short animation, the horse can be summoned by pressing H.
    • Fort Schematic Potion: Used to place down a fort in a clearing. Cannot be placed on most surfaces. There are 3 different fort types. (Removed)

    After a few seconds, the corruption storm will begin closing in on the first circle. If you are within the corruption storm, you will take damage over time. The damage caused by the storm scales depending on how far the match has progressed, with the final circle’s corruption storm dealing large amounts of damage.

    Once the corruption storm meets the first circle, a second circle will appear and you will once again have some time to move to the next circle. The circles get progressively smaller and faster as the match drags on. Your objective is to keep moving in order to stay within the boundaries of the circle before the corruption storm closes in.

    Nearing the end, the area of the circle will be incredibly small and there will only be a handful of players left. If you’ve made it this far, you’re inches away from victory. The last man standing wins.


    Tips and Tricks

    The two prominent ways of winning involve aggressively pushing towards the middle of each circle or surviving around the circle’s border without engaging in fights. As with all battle royale style games, landing farther away from the pink vortex at the start will result in you encountering fewer players and better chances at loot.

    A well balanced loadout places you ahead of the competition (Refer to tier spreadsheet). Ensure that you have both melee and ranged weapons so you can engage enemy players at any distance. An optimal loadout consists of two melee weapons consisting of one of the two spears (‘Spiritpierce’ or ‘Lifebringer’ considered tier 1) and two ranged weapons of your choice (‘Grimoire’ + Bow/Crossbow).

    Headshot hitboxes exist in this game mode, landing a headshot results in double the damage of a body shot (2x damage multiplier). Currently only ranged weapons such as bows, crossbows and wands are able to land headshots, hence carrying one of these is incredibly important. Keep a lookout for players standing still in order to heal or repair armour, stationary targets make for easy kills as long as you land a hit to the head.

    Utilise the over-the-shoulder camera to its full potential. You can position the camera to view your surroundings while keeping yourself hidden. This is incredibly useful for scouting and getting an overview of any fights that are taking place. Keep an eye on your hit indicator as it highlights the direction of incoming damage. This lets you react swiftly and helps even out the element of surprise that an attacker has.

    When playing as a squad, it’s a good idea to co-ordinate where you land (Example D4, G6, F8, etc). You can also right click to place markers on the map. When you spot enemies, call out their direction by looking at your overhead compass. Make sure not to land too close to each other as you do not want to fight over loot.

    There are a variety of destructible environments that can be destroyed using weapons and skills. Use this to your advantage to block paths or cover your escape. You can break doors from a distance using your ranged weapons to check if there are players inside. This is a useful tactic to ensure you do not open a door and get jumped. While doors can be easily broken using your weapons, if you’re taking on a stealthier approach, close doors behind you after you enter a building. This helps cover your tracks from enemy players.

    When you successfully enter the area within a circle, do not make the mistake of assuming every other player is also there. Players will be coming from within the corruption storm and can still attack you from behind. Keep a watchful eye for players using ‘Breastplate of Dark Pact’ as the active ability on it grants the player 50% damage reduction from the corruption storm for a few seconds. This lets them skirt around the edges and attack unsuspecting players while within the corruption storm.

    In most scenarios, you will not be able to run uphill as you will simply slide off. Hence holding high ground gives you a significant advantage over enemies at the base of the hill. However, using the ‘Catfall Boots’ lets you jump over slopes to reduces this disadvantage. They also make your footsteps silent and make for a good gap closer.

    Besides it’s intended use of highlighting players through obstacles, the ‘Crossbow of Revealing’ also highlights players in stealth that are using the ‘Invisibility Aegis’ chest armour. It is also one of the best medium-long range weapons in the game. The ‘Wand of Light’ active ability can be used to mark players, this could potential turn the tide of the engagement as other players will be attracted towards the pillar of light in hopes of eliminating the competition.

    The ‘Firefrost’ (Potion launcher) may be hard to use, but is incredibly powerful for destroying structures and disorienting enemies. While it may not shine as much in solo modes, this weapon’s usefulness increases in squads and enclosed areas, where the AOE from the fire potions shines as it can be utilised to corner enemies within buildings, destroy multiple structures simultaneously or simply assist with zoning enemies.

    Horses can be found in the open world and can be acquired by holding E and then pressing H to summon them. Beware though, as it makes you an easy target as players can see you riding your horse from miles away. However it does make for great situational use when you know you are safe and simply need to outrun the corruption storm. General mobility-based equipment such as the ‘Blink boots’ are more reliable.


    apoc adeventure pathQuesting and More

    The Battle Royale mode features an ‘Adventure Path‘ similar to Fortnite’s Battle Pass which lets you complete quests and unlock cosmetic rewards such as weapon skins, appearances, outfits, emotes and more. These quests are of two types, the first being daily quests which can be completed in a short amount of time and the second being weekly quests which are related to the lore of Verra (Ashes of Creation’s world). There are two types of paths, the first is your standard Adventure path which lets you progress through 20 rewards, while the second is a ‘Legendary Path’ which can be purchased for 10$ to unlock an additional 50 progression rewards with even more cosmetics to unlock. Furthermore, all the rewards that you unlock will be carried over to the MMORPG at launch for you to use.


    Controls Layout

    Keybinds provided by Intrepid Studios
  • Kirby’s Alpha 1 Combat Analysis

    Kirby’s Alpha 1 Combat Analysis

    Kirby’s Alpha 1 Combat Analysis

    With the unveil of the Alpha 1 combat trailer, I decided to share my analysis of the trailer to highlight noteworthy elements and discuss them in detail. In case you missed it, you can view the full trailer here. The key points that I took away from the trailer are below, followed by my thoughts on each of them. Please let me know if you enjoyed reading this article, I’d love to do more of these in the future!

    • Melee Telegraphs
    • Potion Launcher Physics
    • Headshot Hitboxes
    • ADS (Aim Down the Sight)
    • Weapon Swapping & Reloading
    • Mobile Casting & Mobility
    • Sonar & Stealth Counters
    • Un-obstructed Teleport
    • Weightless Actions
    • Final Thoughts


    Melee Telegraphs
    The closest combat system that this can be compared to is Wildstar. I’ve created a simple visual to help explain the process of hit registration when it comes to melee weapons. Upon taking a closer look at the way melee action combat seems to work, the hit appears to register on the targets present within the invisible cone-shaped telegraph. This means you could theoretically hit multiple targets as long as they are within the cone shaped telegraph based on your weapon. Based off of this, we can assume that certain weapons such as the greatsword and polearms will have a larger telegraph due to them having an innately larger reach, whereas daggers would have a much smaller telegraph, with one-handed swords and axes falling somewhere in the middle.

    Wildstar Telegraphs.jpg     


    Potion Launcher Physics
    The potion launcher weapon type- as stated by Intrepid, changes the way it functions depending on the type of ammunition used. Using frost ammunition results in slows/snares and fire ammo results in your typical area of effect explosion. However, interestingly enough, instead of a simple point and cast telegraph AOE, the ‘potions’ that are fired through the potion launcher seem to have their own unique physics similar to a traditional grenade launcher in an FPS/Shooter. This means individual shots fired from the potion launcher will bounce along obstacles/terrain before exploding, making them quite deadly in enclosed spaces. What does this mean for large scale PvP? We could be looking at a possible new anti-zerg potion launcher meta, where players equipped with potion launchers would simply lob their shots skyward to land within the enemy zerg, resulting in maximum impact due to their shots colliding with the tightly packed players present within the zerg.


    Headshot Hitboxes
    In the video we see the player pull off a perfect execution, which is the result of swapping from a staff into a bow, to pull off a slick headshot. Steven later clarified during a Discord QnA that headshot hitboxes will be present in Ashes of Creation for now. The presence of separate hitboxes for the character’s head are commonplace in the FPS and shooter genres. However this raises the question of how the headshot-hitboxes work, are all weapon types and abilities able to trigger the headshot multiplier? If so, then does this mean we’re going to have to aim for the head even when using melee weapons such as swords and daggers? How does this work for different character heights – since some races like the Tulnar are innately taller/larger than their human counterparts, this makes it easier to aim for the head, whereas dwarves will probably be harder to land headshots on. Melee weapons and racial traits aside, how would this work in regards to skills/abilities? Since, for example, the meteor skill lands from above – resulting in it hitting a character’s head first, does this mean all airborne skills will innately trigger headshot multipliers? The more thought that is given to this mechanic, the more complicated it seems to be.


    ADS (Aim Down the Sight)
    Another surprise that viewers may have missed is the ability to aim down the sight (ADS) within the video. Typically mmorpgs almost never utilize this feature as it is something used primarily in first person shooters. However, considering that we now know that headshot hitboxes are a thing, this changes the value of ADS within the game from a minor feature, to a major addition for players to help land headshots in order to dish out more damage. Due to the presence of ADS, we can also assume that certain toolbelt items hinted at in the past, such as the spyglass would also be usable in a similar manner through aiming down the sight.


    Weapon Swapping & Reloading
    Throughout the video we see multiple examples of seamless weapon swapping, which is the result of Intrepid fulfilling their promise of allowing the use of any weapon on any class. This is being done to promote the creation of unique builds and not lock players to the use of a single weapon type per class. That aside, we see another FPS/Shooter feature that has been integrated into ashes- Reloading. In the clip below, you see the crossbow user reload his crossbow after firing a few shots. It is safe to assume that other weapon types such as the potion launcher will also feature similar reload mechanics. Whether we’ll have fixed or unlimited ammunition while auto-attacking remains to be seen.


    Mobile Casting & Mobility
    It’s pretty clear throughout the video that Intrepid did their utmost to showcase the amount of mobility available to the player, be it in the form of casting while in mid air or blending excessive amounts of dodges between attacks. This should be a significant draw for players that prefer the faster pace of combat such as rogues and fighters. Regardless, the main take away from this is that they’re heading in the right direction as we’ve already seen the tab-target gameplay involve plenty of non-mobile skill casting. Putting both combat styles together would eventually result in a combat system that is well balanced with both mobile and stationary abilities.


    Sonar & Stealth Counters
    An interesting ability as it appears to be a special skill which allows the user to see enemy players through objects and walls. It raises certain questions such as: Are the enemies highlighted via the sonar skill only visible to the caster? Or will they be visible to all friendlies/raid members? Such an ability also further expands on Intrepid’s process of ensuring that stealth will not be overpowered. We can definitely expect to see more stealth-revealing abilities further down the development process.


    Un-obstructed Teleport
    Traditionally in MMORPG’s, teleport skills usually work via direct pathing, meaning if there is even the smallest obstacle of minimal height in the way, the player does not end up at their desired destination as the object obstructs the destination from the player casting the ability. However in the video we see the player teleport through a fence. What does this imply? It implies that teleporting works similar to projectile travel, which means as long as your crosshair has a clear line of sight to your destination, you will make it there, regardless of the obstacles along the terrain.


    Weightless Actions
    Besides the positives, possibly the only con we can see in the video is the lack of character-based physics, resulting in ‘floaty’ movement. While their focus on mobile casting and mobility is appreciated by the majority of the community, too much of anything is never good. That said, this is something which we can expect to be addressed during the upcoming testing phases as this is merely Intrepid’s first pass at action combat.


    Final Thoughts
    Projectiles from ranged weapons not travelling on a horizontal plane is something else that I noticed while watching the trailer. Being able to fire off projectiles freely that do not travel a fixed distance above the terrain will result in the effectiveness of archers and mages to be reduced by a certain amount, although the headshot multiplier makes up for this loss in DPS, promoting skill over mindless button mashing. A few other concerns such as TTK (Time-to-kill) and low cooldowns on certain spells such as the meteor were addressed by intrepid who stated that they were exclusively to showcase the combat in the trailer, and in-game, the TTK and cooldowns would definitely be a lot longer. If this is their ‘first pass’ at action combat, naturally we can expect all of the above to be tweaked and perfected throughout the development process. All in all, I’m incredibly excited for what the future of Ashes of Creation holds and I cannot wait until we’re all in-game!


    Kirby – Writer – Artist
  • C0ug4r’s Alpha 1 Map Analysis

    C0ug4r’s Alpha 1 Map Analysis

    C0ug4r’s Alpha 1 Map Analysis

    This is an analysis of the Alpha One Environmental Preview created by c0ug4r which was first shown in the July 9th twitch stream.
    You can find their original post on the Ashes of Creation forums here.

    Watching that video for the first time I instantly wanted to match all the different sceneries together, creating a better overview and being able to place them into what would later become a map of the shown region. However this map is far from accurate or complete. I couldn’t place all the sceneries and the accuracy of the ones I could place is questionable, as perspective is deceiving when things seem closer or further away than they really are and relative angles are hard to figure out. Nevertheless I could puzzle together most of the major sites and the result could be used for approximate navigation:
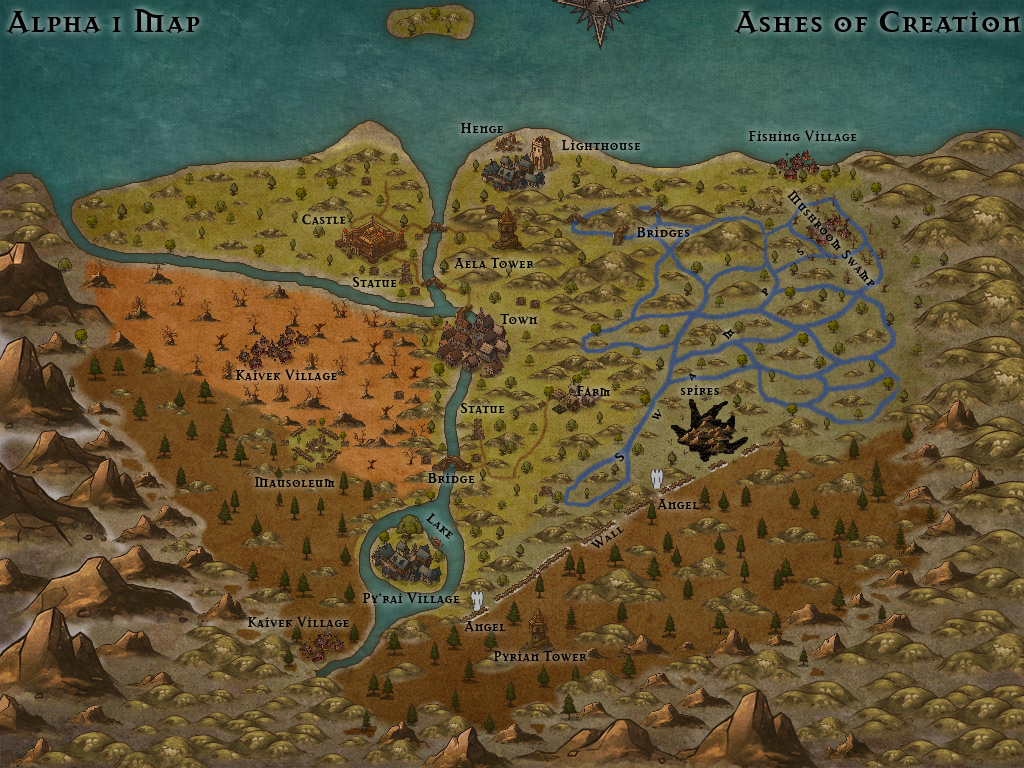
    This map was created with https://inkarnate.com/ and is free for non-commercial use. See how the wall between the angels looks like bacon? That surely means this map is Bacon confirmed!

    So much for the end product. For the ones who think they are interested in how I pieced this thing together and want to know if it really adds up I’ll give you fair warning: This analysis will be long! To spare you some time though, I started with the part that leaves speculation about the kind, use or story of all the buildings and locations behind and only focuses on the map layout.

    After that we will take a more detailed look at the many sceneries, though I will still keep speculation and mere descriptions to a minimum, focus on placing everything where it possibly belongs and pointing out little details that you might have missed.


    First Things First

    Some remarks before we start: I know Hand of Unity released an analysis video two weeks ago which did a great job in showing and explaining a lot of the Alpha 1 sceneries. But I felt it missed some points and didn’t give the general map overview I was looking for. If I had any knowledge of video editing and spoke fluent English this would be a video too. But i don’t and this isn’t. So have fun with all the pictures and text!

    For the analysis we’ll have a look at each of the scenes presented in the video. That’s 42 scenes in total some of them showing different perspectives as they proceed, needing more than one image to cover all that is shown. I won’t follow chronological order as that’s not the best way to get a better understanding of the map as a whole. But wait there’s more! During the stream they also showed 8 screenshots. We will deal with them too. I would strongly recommend you watching the video or the respective scene while reading. I stuffed a hundred links in here to direct you to the related part of the video or corresponding picture. Having the map at hand certainly also helps you orientating in Verra’s first Alpha 1 region.

    There’s certainly some things I got wrong regarding Ashes of Creation (I’m not good with the races and their architecture) and the English language (must’ve missed topographical and architectural descriptions classes). So point out any mistakes! (and let’s see if I’ll find the time to correct them)

    A Bird’s View

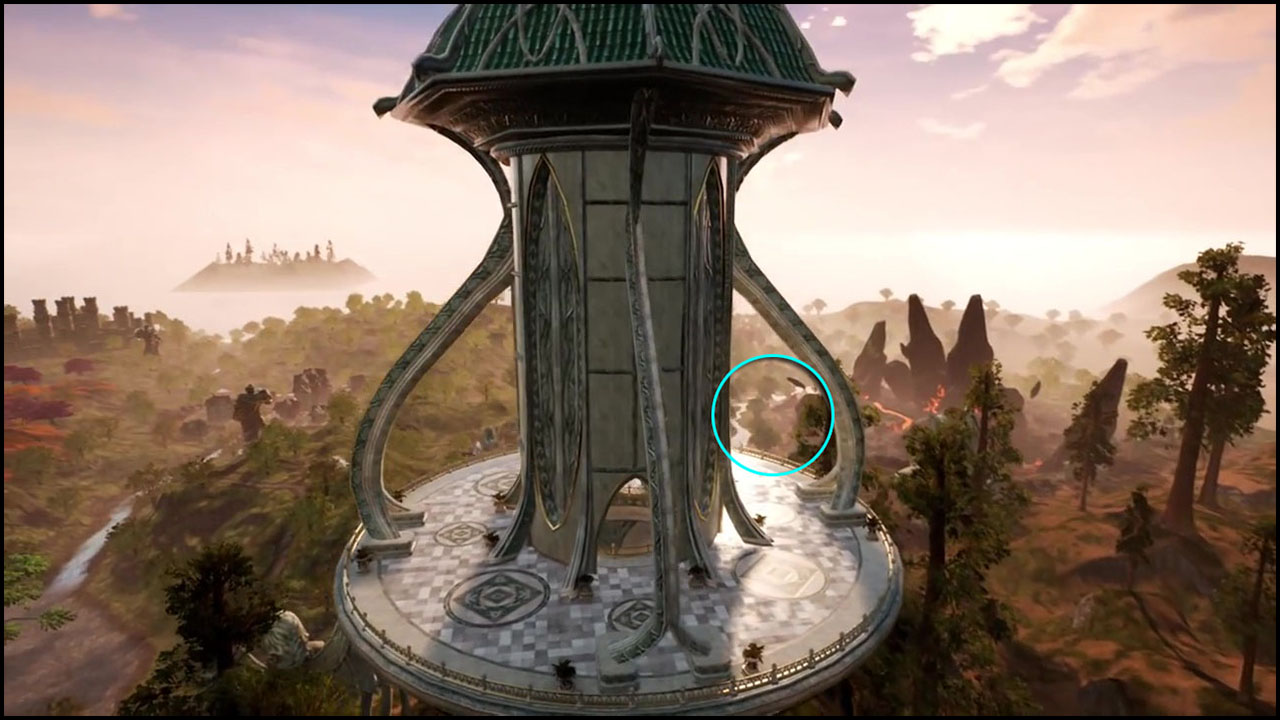
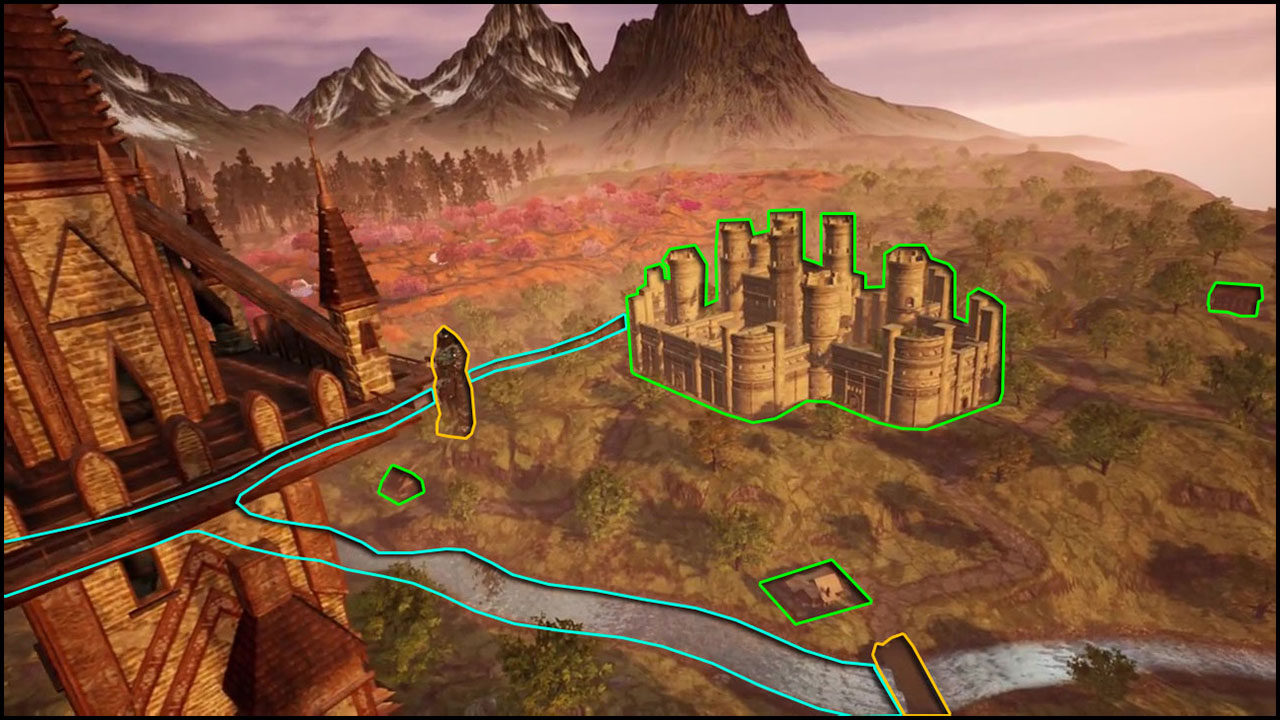
    To pinpoint all the smaller sceneries we first need a general overview over the region. Great view comes with great height and the preview provides at least 5 scenes which deliver exactly that. Scene 23 nearly covers the entire region thus giving us a perfect first impression. Scenes 14, 30, 40 and 43 all cover a smaller angle and range which give a closer look at landscapes that are pretty far away or not even visible in Scene 23.

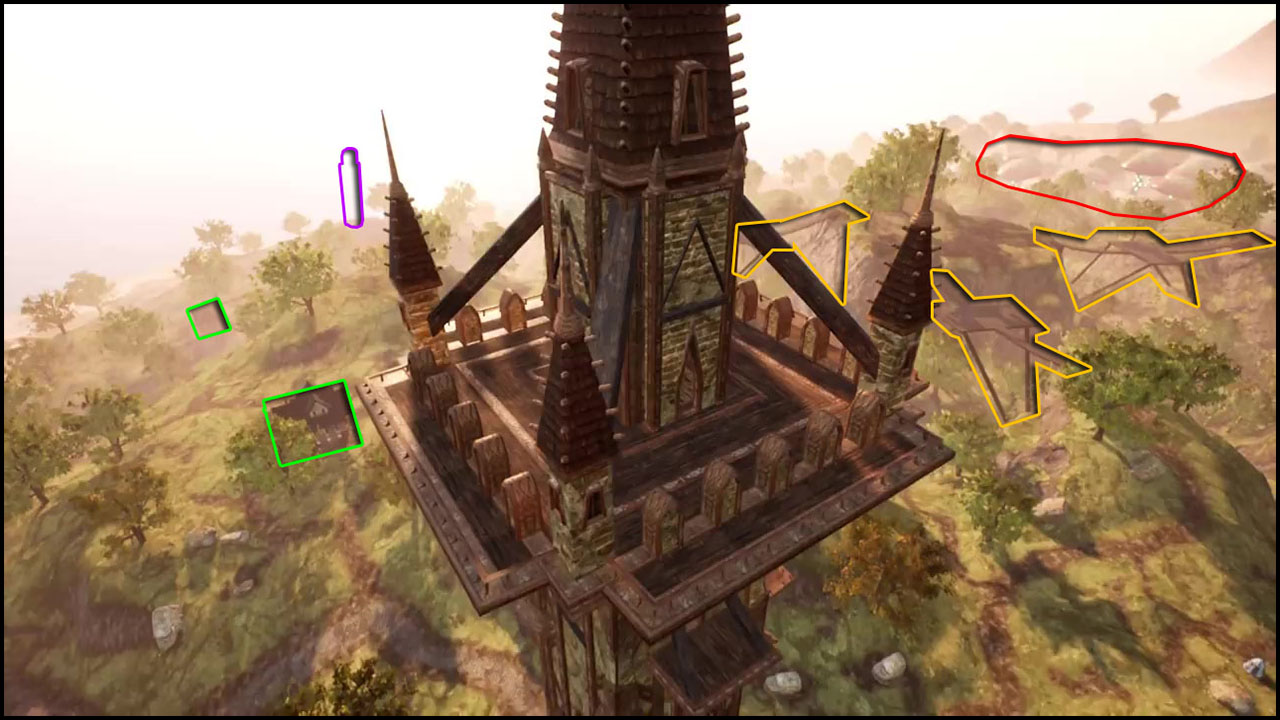
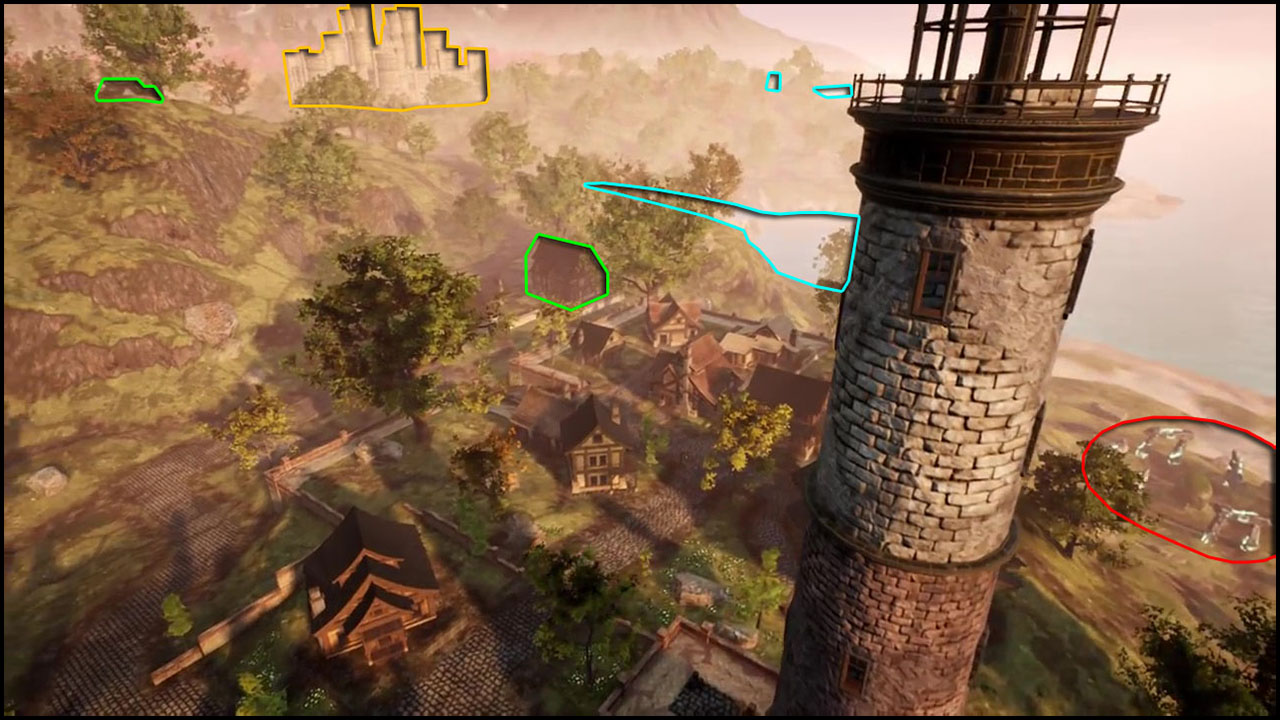
    The color code for the markings in the pictures is: Green for buildings. Orange for any other structure. Red for special landmarks. Blue for water. Pink for the two towers and the lighthouse.
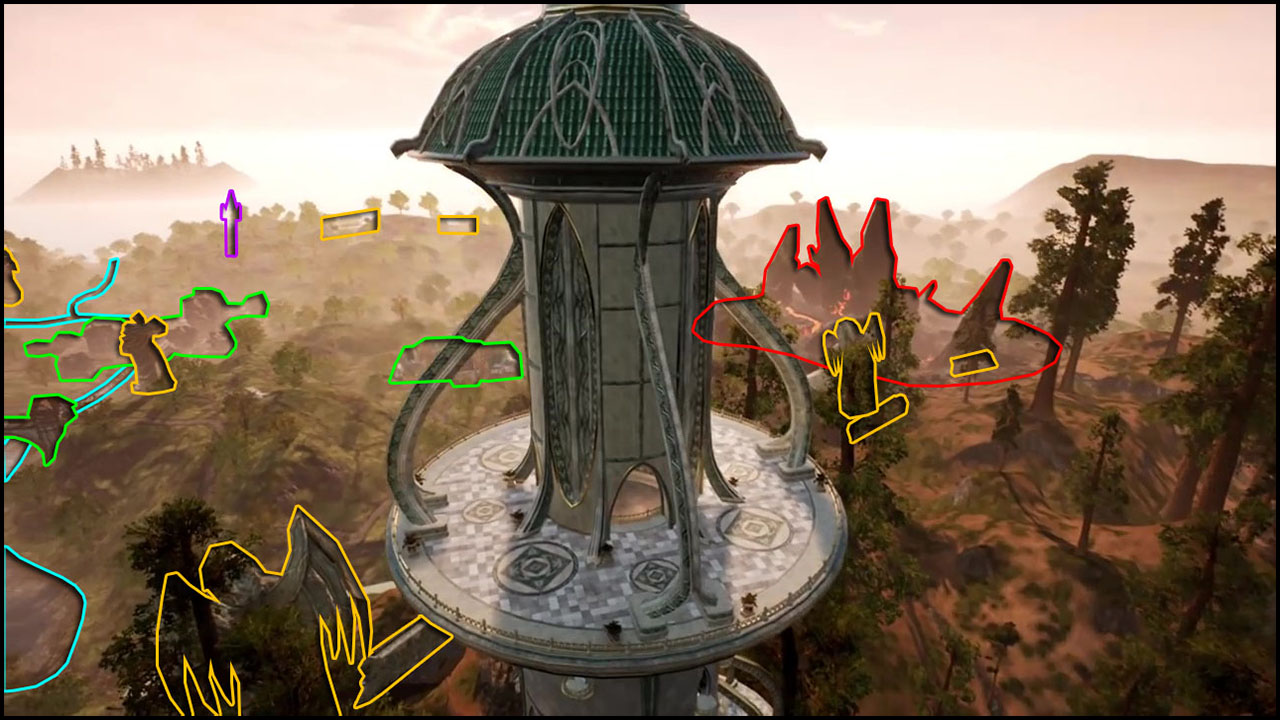
     

    Scene 23 (1:26)

    • Central element is what should be a Pyrian tower. We can only see an upper part of it, but can clearly determine it standing in a sequoia forest which apart from the great trees offers nothing else of interest.
    • The coniferous forest is limited by a wall which spans between or alongside two big angel statues. Facing away from the tower the terrain in front of them drops quite a bit. While the angels seem intact the wall is not. If you watch closely you will notice several breaches.
    • Especially the right side was obviously broken by an area of volcanic activity which is centered by some large spires.
    • Surprisingly not too far away left of this devastated area stand some houses with green roofs. These will later turn out to be a farm.
    • The surrounding area is now covered by deciduous trees of normal height and the terrain is more flat.
    • Further to the left sits another large statue. This one something like a guardian. It is standing at the edge of a cliff which leads down to a river.
    • This river seems to originate from a lake in the lower left corner and runs to the top. Its far away passages cannot really be seen in this scene, but are visible in others.
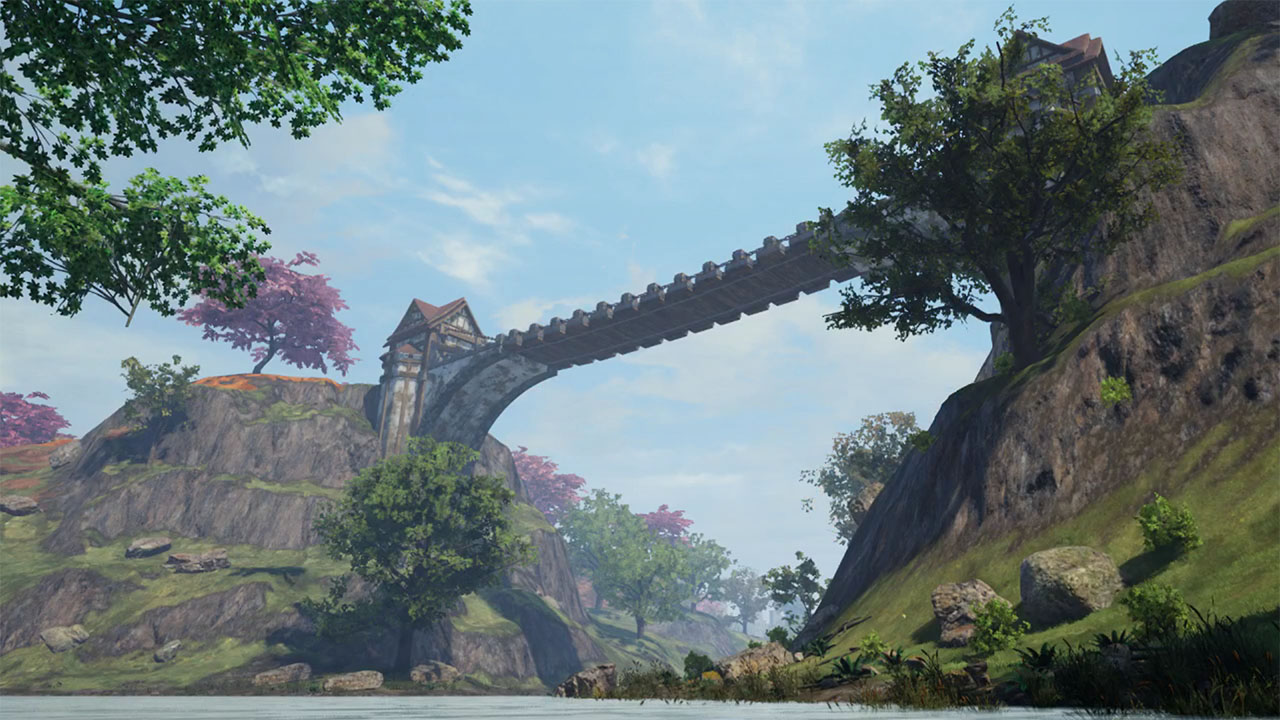
    • Right behind the lake a bridge spans over the deep river valley. Notice: It is only visible at the beginning of the scene and mystically vanishes after a second.
    • Shortly after passing the guardian statue the river enters a town that will likely be the biggest settlement of this Alpha 1 region.
    • Behind the town the river turns left and splits right after. One branch running directly towards the ocean.
    • The sea covering the whole back of the scene features a single island in the upper left. We can’t see any other shoreline as the terrain in front is quite hilly.
    • Some larger hill limits the region in the right top.
    • The pink and two orange marks near the ocean point out another tower and some bridges. While the tower is invisible the bridges may or may not be vaguely perceptible, but all will later be clearly shown in this area.

    • The breaches in the wall by the volcanic area are now more visible though the wall itself is often covered by trees.
    • The lake in the bottom left also shows a huge tree and for a short moment a small part of the island where it’s rooted. We will later see that this island is also home to a village.
    • On the other side of the lake and river the terrain ascends up to an area with orange soil or grass and pink trees. A single house can be spotted.
    • To its right we can still see some houses of the town and beyond that not only do we see the twin statue of the guardian, but also a nearby castle with many defence towers.
    • Left of it water cuts through the land. At that distance it seems too big to be part of the river making another isle much closer to the mainland more probable.

    • As it’s neither visible in the beginning nor the end of the scene I almost missed an important detail: There’s water between the farm and the volcanic spires. As it may first look like a river flowing from the tower to beyond the spires, later scenes will show that it’s part of the swamps. Knowing that, if you look closely you will notice the treetops of most trees right of the tower are shaped differently to the ones left of it. That’s simply because the ones on the left belong to ordinary forests and most of the right ones are trees of the swamp.
    • When reviewing the scene at a later point I also discovered water right behind the farm that’s visible at the beginning of the scene, but in none of the above pictures.

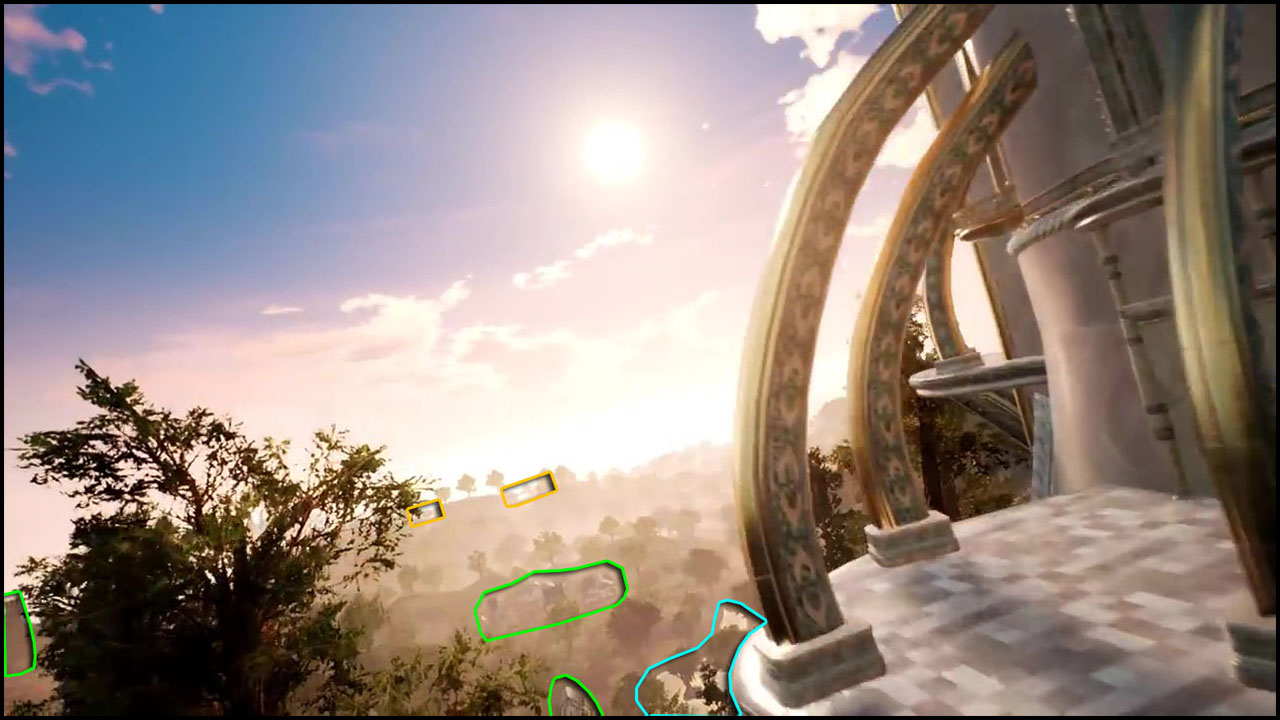
    Scene 43 (2:12)

    • The closing scene shows the Pyrian tower again though this time the best view we get is from the beautiful sky.
    • Things we already saw are the castle in the bottom left corner, the farm in the middle and another broken part of the wall (beneath the balcony and not visible in this picture)
    • It might seem strange we cannot see the left of the two angels, but it is just too small.
    • I would argue again that we can see one or even two bridges in the back, but it could be my imagination or knowledge of scenes to come.
    • What makes this scene interesting at all is the area in front of the farm and to the feet of the wall. We can only see a small part of it, but what we can see is more water of unknown dimensions, a swamp tree in its middle and another house with a green roof. This means there’s not only swamp to the right of the tower stretching far to the ocean, but also between the wall and the farm which now is surrounded by the swamp from three sides. While at first I was hardly able to place any of the swamp it surely grew bigger and bigger in the process.

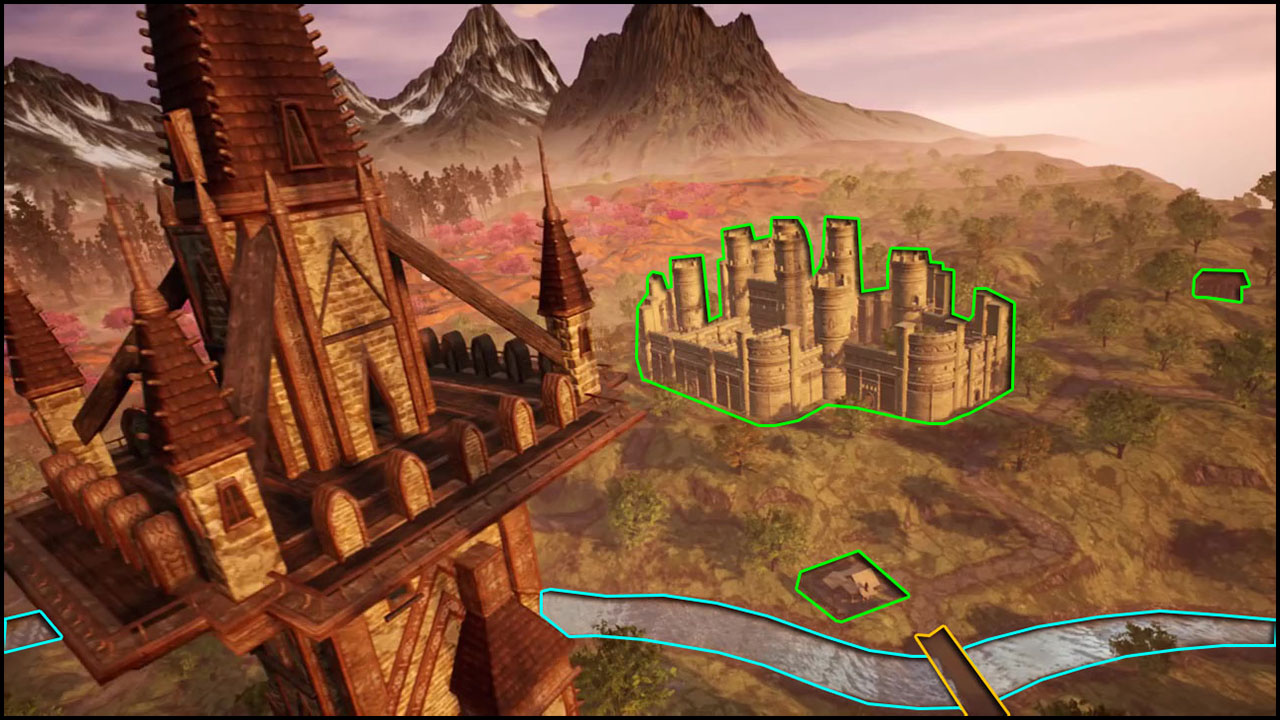
    Scene 14 (0:51)

    • This scene focuses on another tower. This one being more spiky than the elegant Pyrian tower it was probably build by Aela. It is the pink tower marked in Scene 23 where it could not actually be seen.
    • However having the castle right across the river gives you a good impression to where you are looking from in relation to Scene 23 and of the position of the Aela tower.
    • The castle is surrounded by some solitary houses and has access to a bridge across the river.
    • The area around the castle stretches far to the top flanked by the sea shore to its right. Again the terrain is too high up to see the coast line itself.
    • Left of the castle lies the orange land with pink trees again. In this scene you see it is not only a small area, but reaches just as far as the bordering land types.
    • Even more to the left grows the same kind of forest that surrounds the Pyrian tower.
    • The whole area is confined by large mountains in the left and back of which only the closest isn’t even a bit covered in snow.

    • The guardian statue in front of the castle is revealed with another house to its feet. The way coming down from the castle seems to end at the river, but in fact we’re dealing with another invisible bridge as we will later learn.
    • You can see some bright areas in the pink forest which look too shapeless to be buildings or other structures. The left one could be a pond and the right one looks much like a stream. If that’s the case the coloring would be just as odd as that of the ground and trees.
    • What can only be seen at the fadeout of the scene is the splitting river behind the tower. The all time visible branch flows right towards the ocean the other one separates the green hills around the castle from the colorful lands and possibly reaches the ocean somewhere in the top right corner. Both originating from the left.
    • There we would see the river running through the town if the camera turned a bit to the left or even the platform of the tower is hiding some of the marginal town buildings.

    Scene 40 (2:06)

    • Same tower, nearly 180° turn. The castle and river are in the direction of the bottom left corner.
    • Though we now directly face the ocean it is still hard to spot a shore line due to the hilly terrain and the mist that is even hiding the sea itself. Still there seems to be some blue water and even a sand beach at the left side best visible at the end of the scene.
    • The terrain in this area is very hilly and drastically descends towards the ocean and right behind the tower.
    • There are also ravines between the hills which are best illustrated by the wooden bridge constructions spanning over them. These are the bridges that may or may not be visible in Scene 23 and Scene 43.
    • Again some scattered houses in the area, but nothing spectacular at first sight.
    • The upper right however shows a mushroom forest instead of the usual green trees. It is hard to tell how close it is to the coast as this part is covered by a tree, but it is definitely a valley not far away from the ocean.
    • Even more to the top right we see mountains rising from the ocean. These are the same we saw at the far right in Scene 23 and they will certainly limit the map in that direction.
    • Though it’s neither hidden by terrain nor mist there’s one building missing here that I marked in pink. We’ll come that now.

    Scene 30 (1:47)

    • It is the lighthouse featured in this scene and we now see it’s surrounded by a whole village.
    • Nevertheless I marked only two houses in this picture. One at the margin of the village the other one mainly covered by the hill in the left. These are the exact same houses marked above in Scene 40 only now shown from the other side. Reviewing Scene 40 it’s very strange we only see that one house of the lighthouse village, but the rest is hidden behind trees and mist or just as invisible as the lighthouse itself.
    • Where there’s a lighthouse there must be water and lo and behold for the first and only time in the preview we can clearly see the ocean! While there seem to be flat beaches at the top and lower right the terrain left and behind the lighthouse rises quickly. That explains why you can’t see any ocean or shoreline in the other scenes.
    • The bay left of the lighthouse is where the river that flows by the castle finally hits the ocean. The castle itself can be seen at the top, the orange land right behind it.
    • We can see some more water cutting into the land at the top. It’s hard to tell, but it could be the same waters that we already saw in Scene 23 at the left edge. Either it’s surrounding an island, forms the mouth of the other river branch that separates the castle’s land from the orange one or even both.
    • Finally there’s a stone circle of dark monoliths with cyan glowing inscriptions that center around a moss-grown stone which will later turn out to be a large stone head.

    With these 5 scenes most of the map could already be filled. We’ve seen all the different land types, their positioning and approximate extent and are able to place many of the shown buildings and structures. If this overview was enough scene by scene analysis for you, this is your chance to stop reading.

    Only one thing worth mentioning in regard to the scenes above before we proceed: I didn’t mark a rather important object that all of you should have seen nonetheless. It’s the one bringing light into Verras Alpha 1. This star (it’s probably not called sun, but I will call it that later on) certainly helped me orientating in some scenes though I hardly mention it. However in some scenes I will, so to let you know where it’s standing on this lovely summer evening I marked it with the compass rose on the map.

    As I already mentioned the scene by scene analysis will not be in chronological order. Instead I will take you on a journey through Verra’s Alpha 1. Sounds better and also gives you a better impression of what belongs together although there will be some inevitable jumps.

    The Py’rai Lake Village

    Scene 18 (1:07)

    • Our voyage begins where the preview video started too. Only we’re facing the other direction. That is the only time we see that village and its surrounding although we caught a glimpse of the lake and the great tree in Scene 23.
    • The location on an island surrounded by a lake, the great tree and the design of the houses probably makes that a Py’rai village.
    • To leave the island the village has access to a jetty just left of the tree.
    • Left behind the lake kneels one of the angel statues and the wall bends behind it. It’s holding something in its hands that considering its length is no weapon but a candle. That gives it an aura of religion rather than strength.
    • The lake’s valley is surrounded by sequoias in the back. In Scene 14 these woods would stand right in front of the snowy large mountains which are nowhere to be seen here. So it seems these ridges may only be present in the left of the map.

    The Pendant Bridge

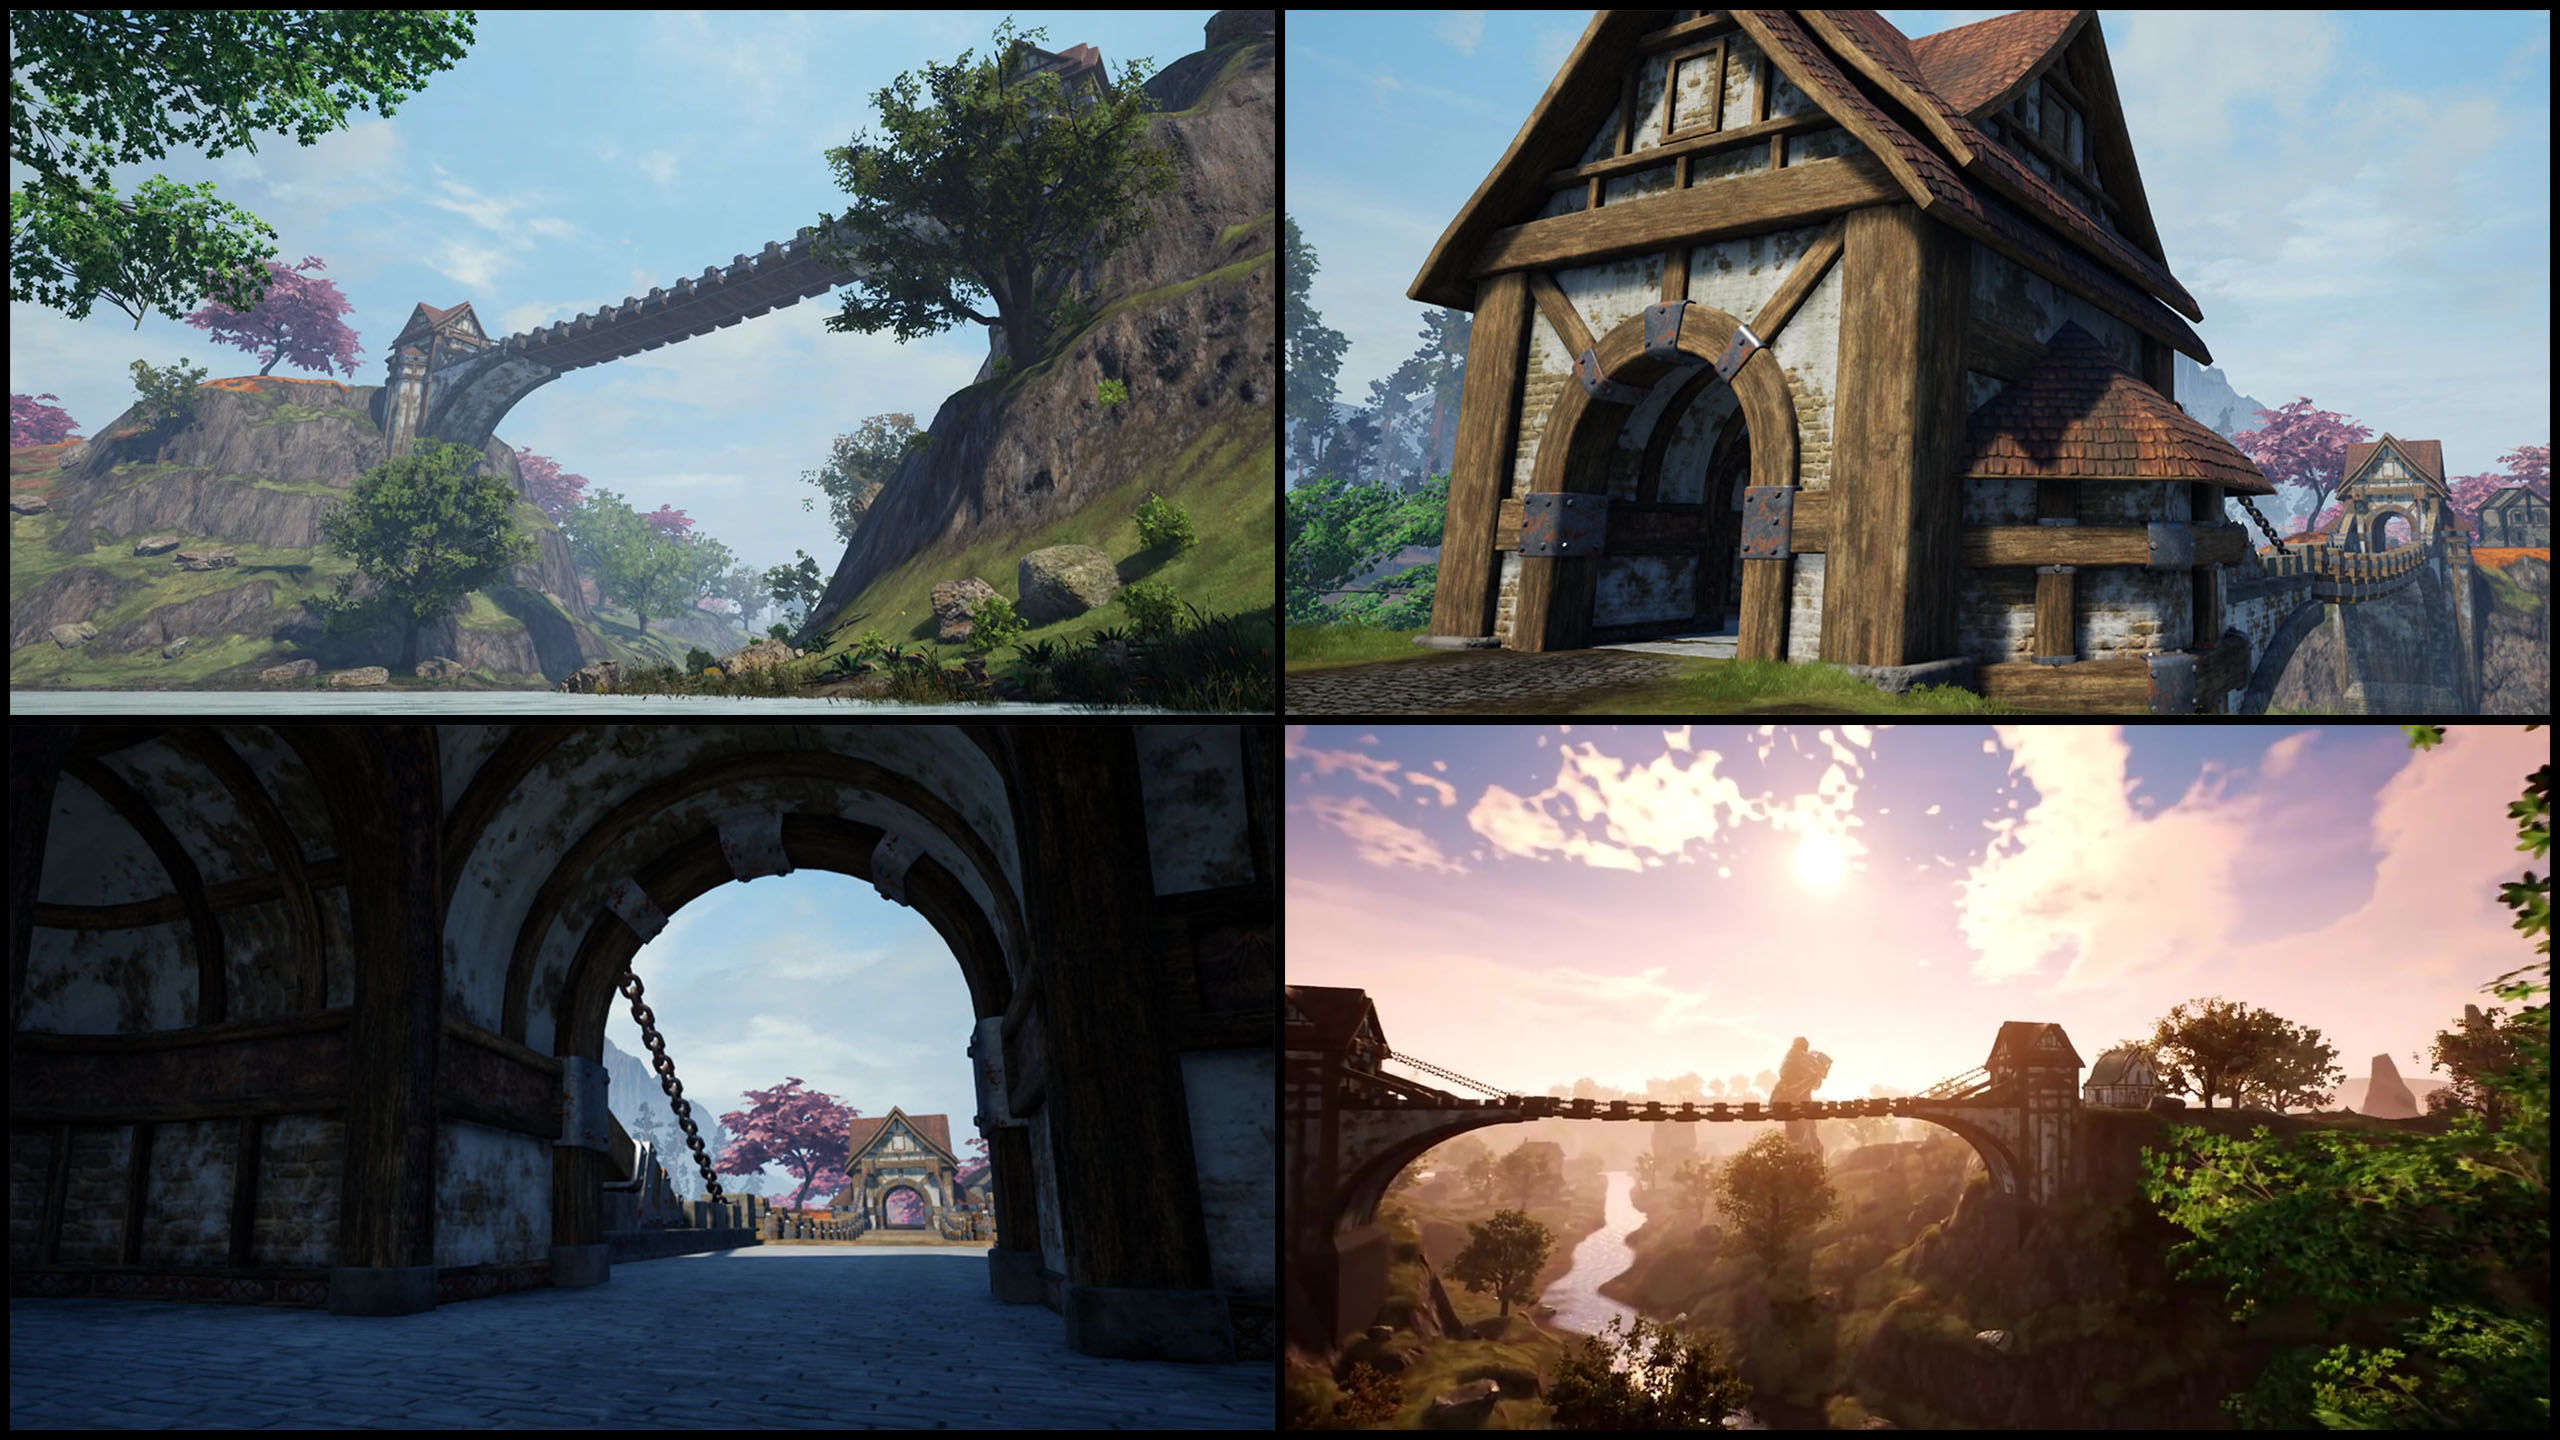
    [Screenshot 3, Screenshot 1, Screenshot 2, Scene 33 (1:53)]
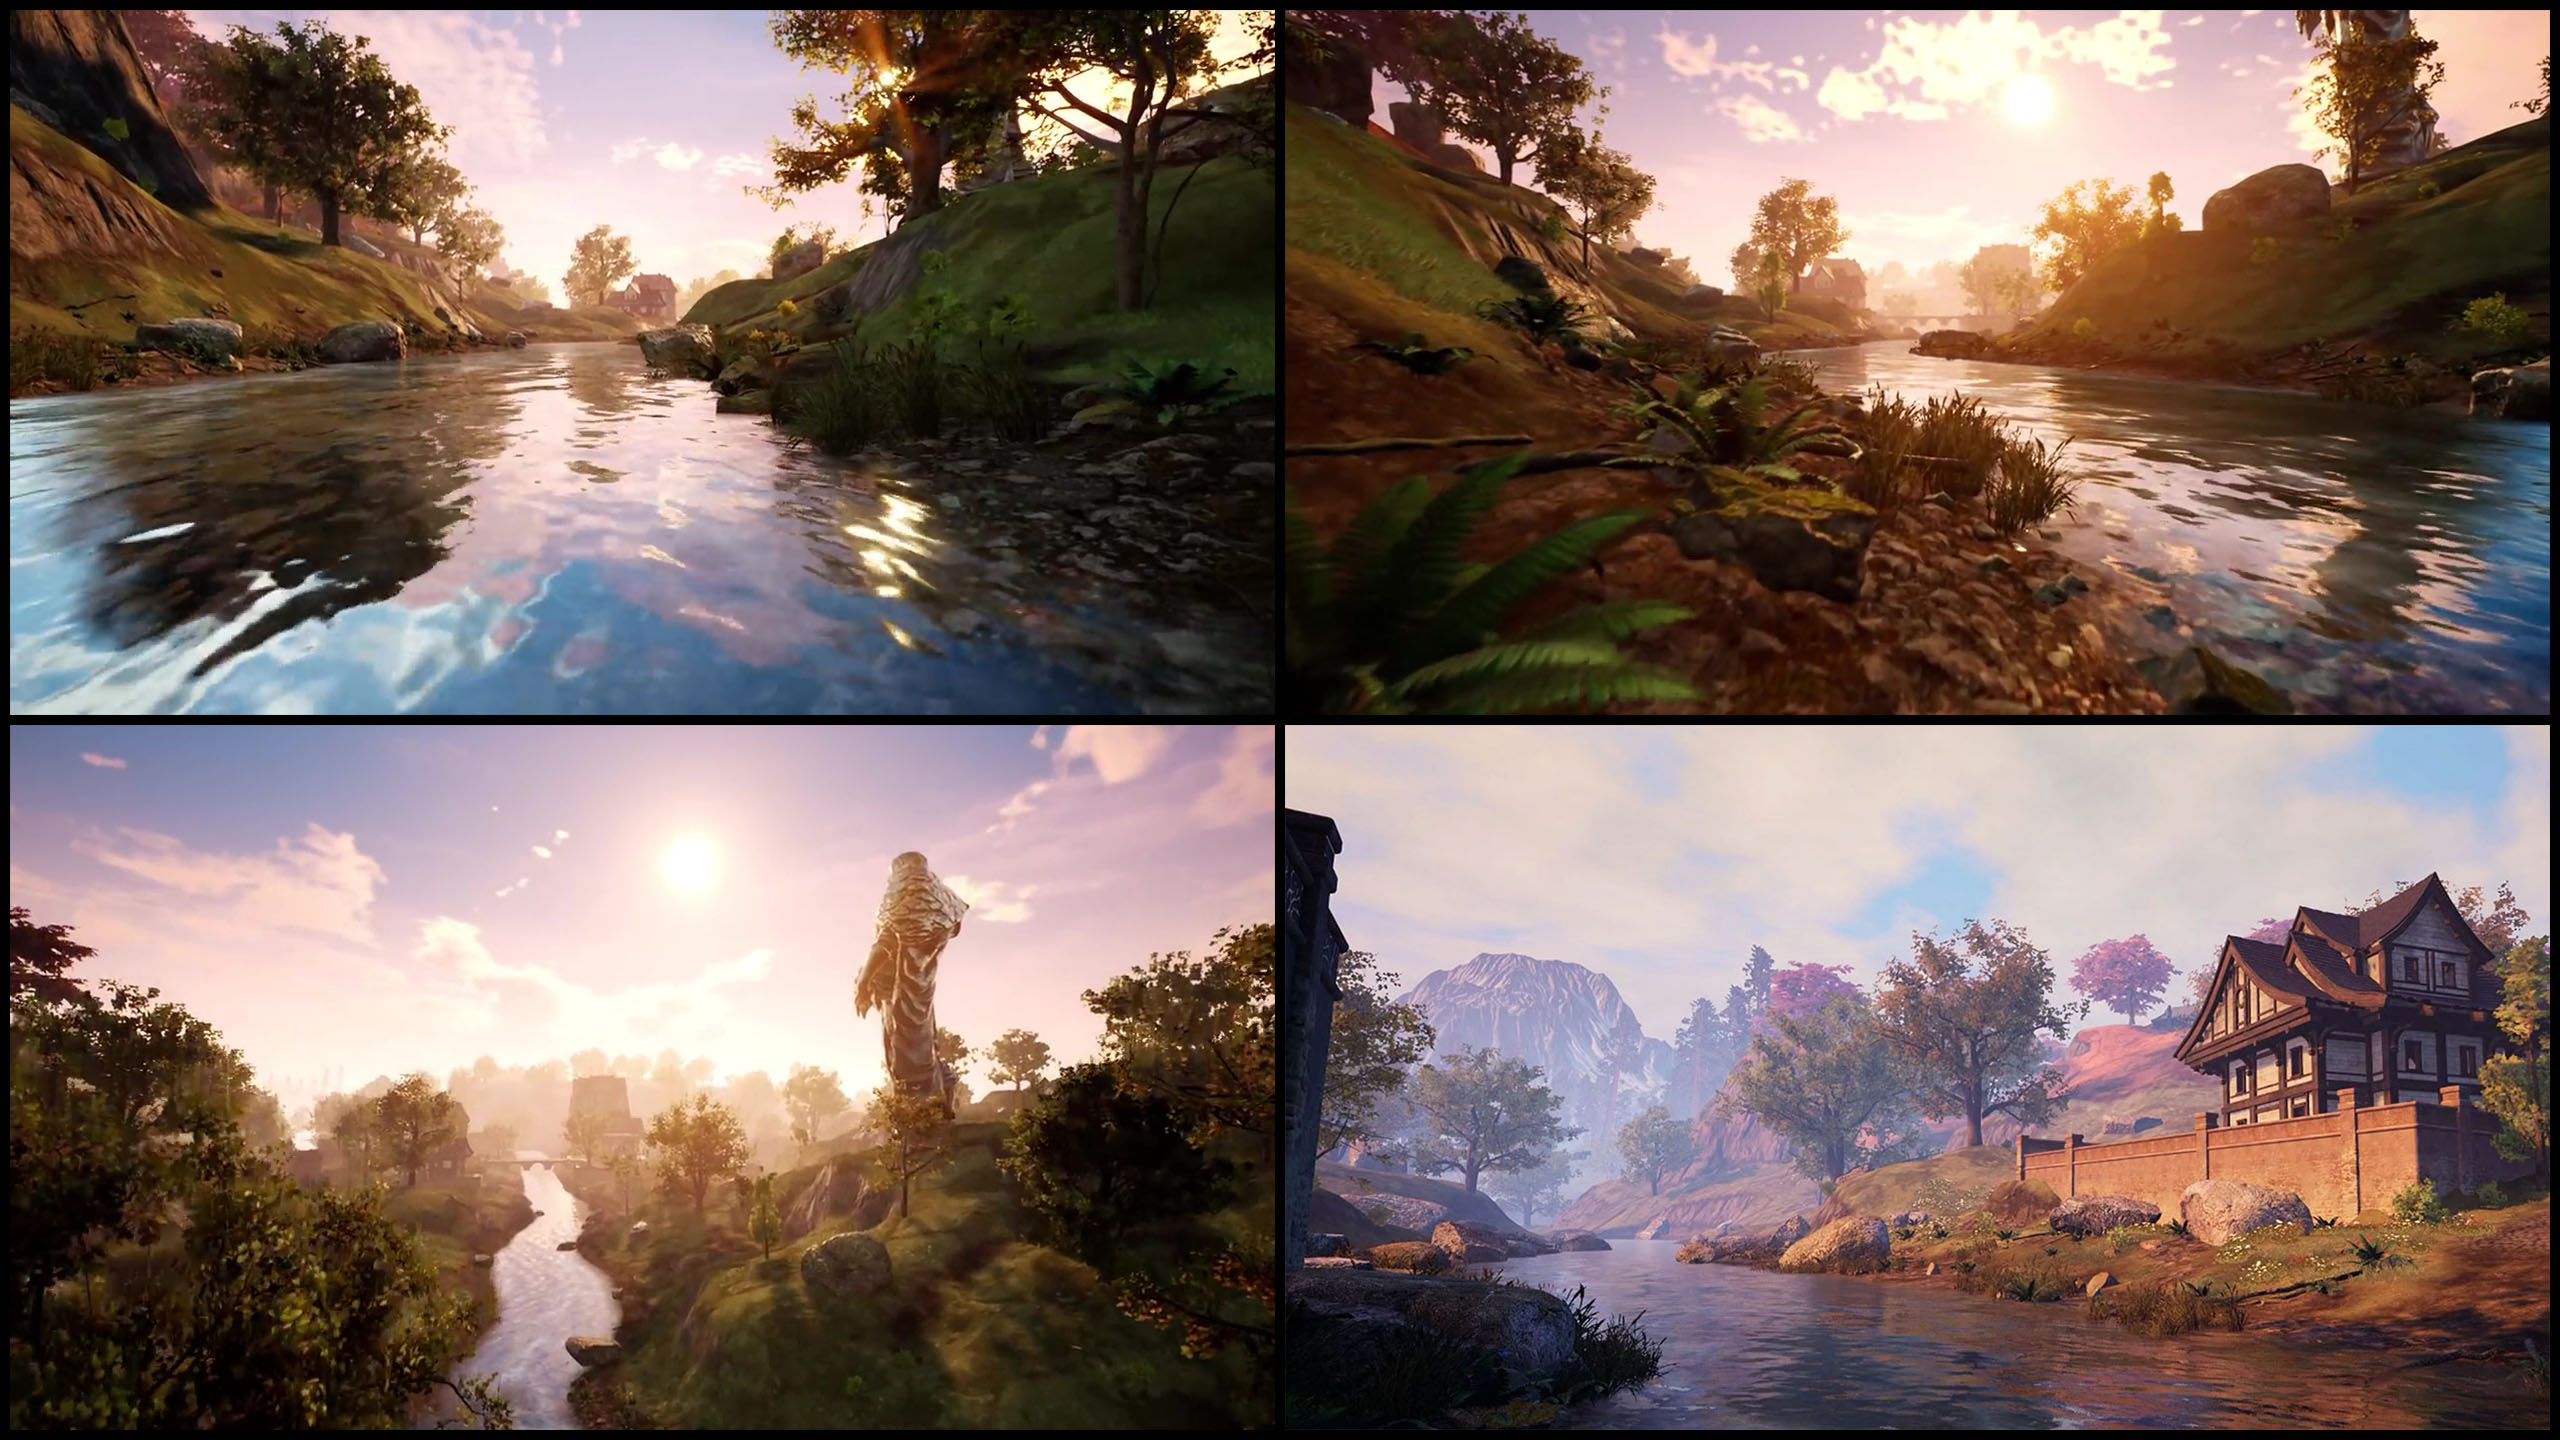
    • In the first picture we’re still at the lake as you can clearly see its surface at the bottom edge and parts of the great tree in the upper left corner.
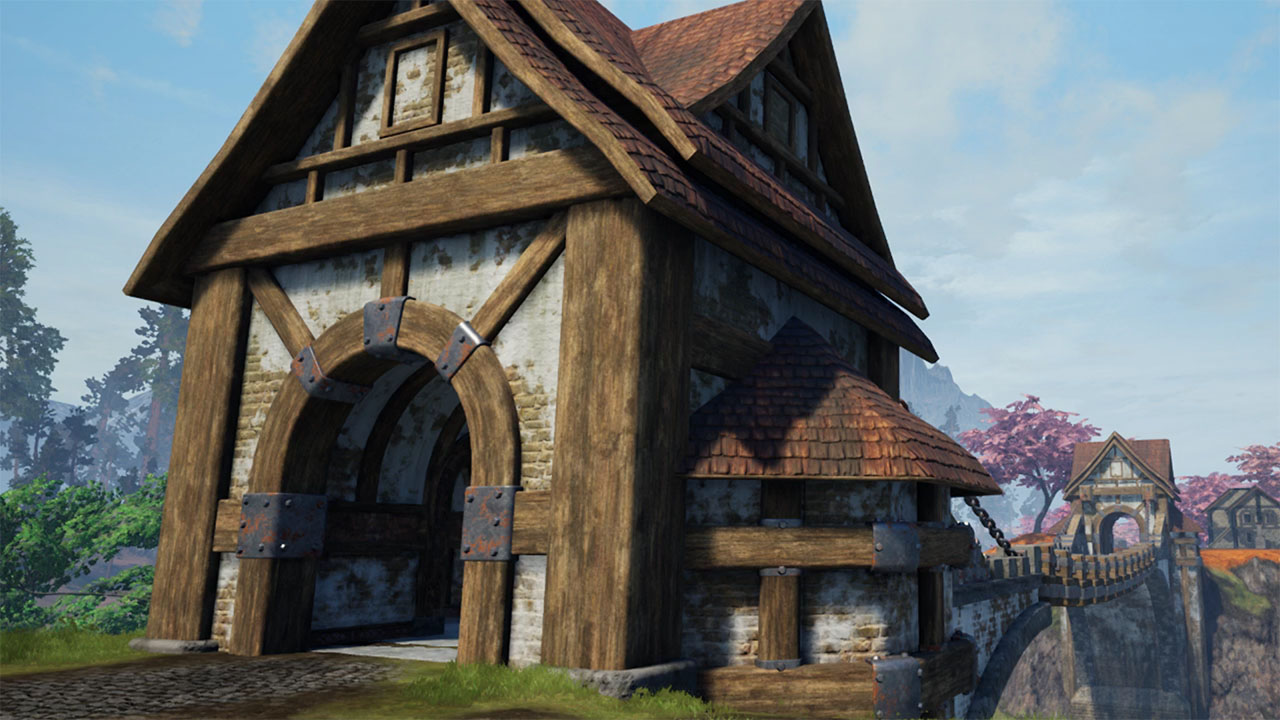
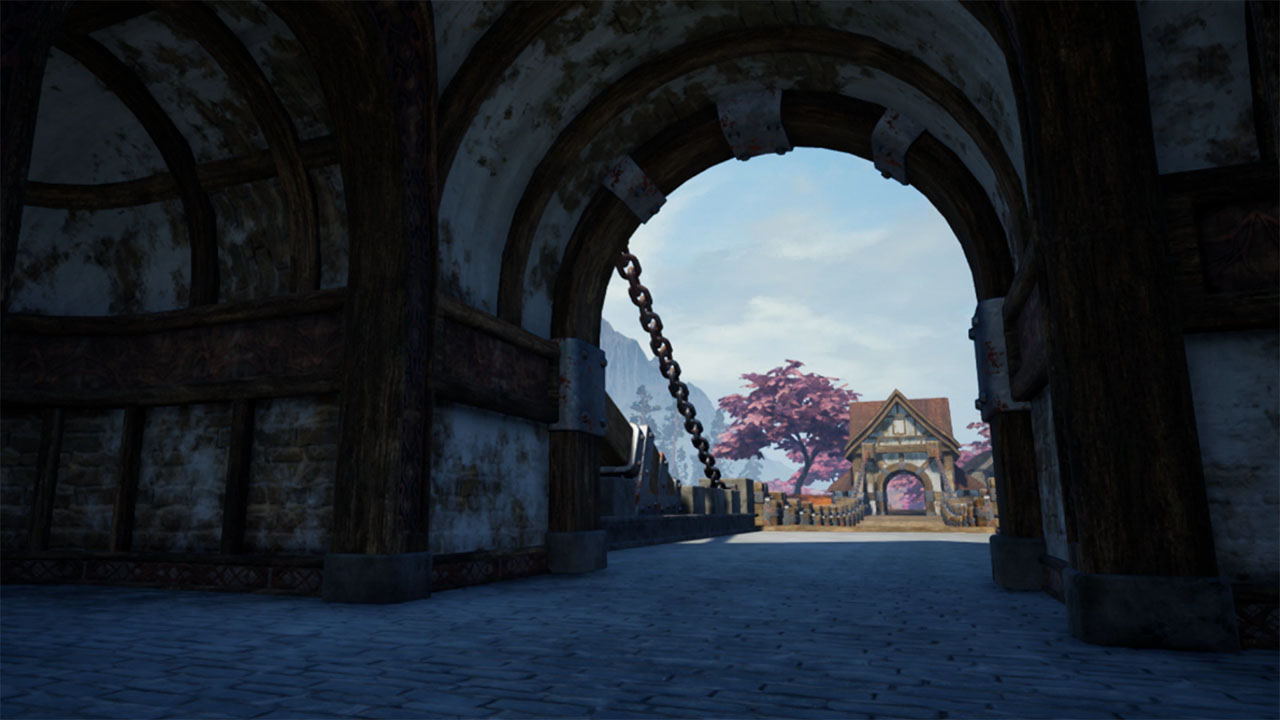
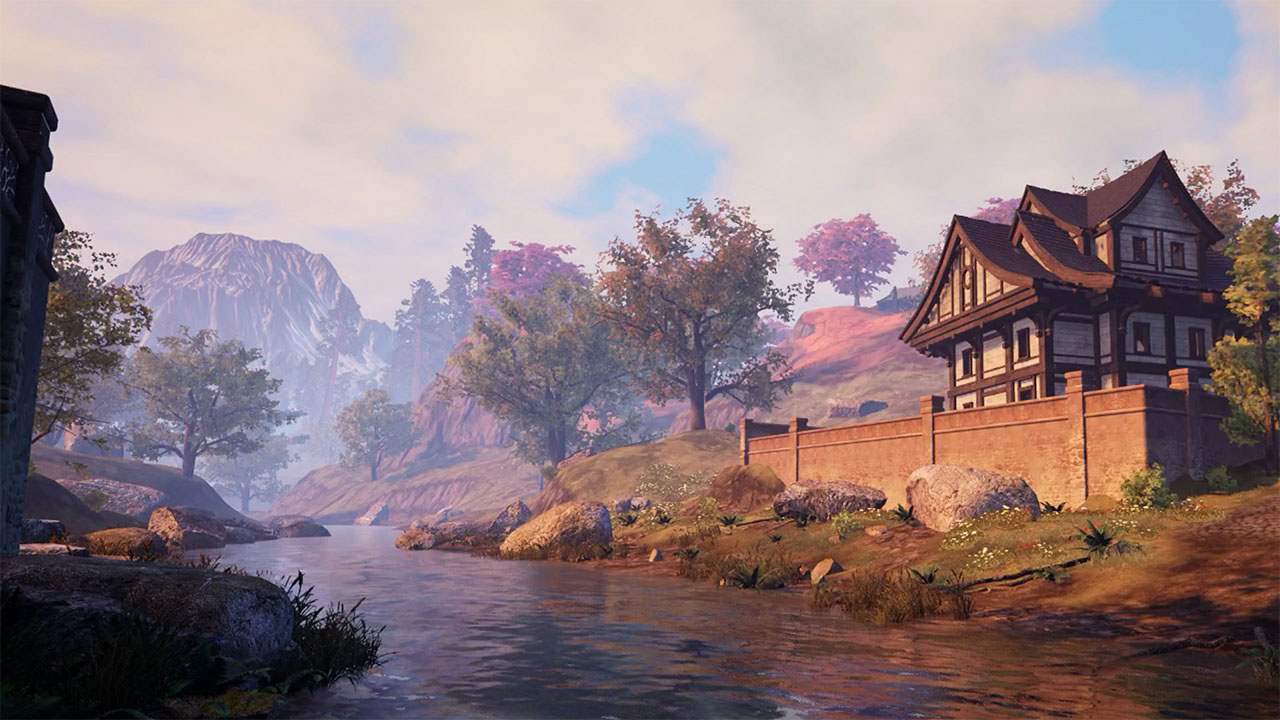
    • We now face the pendant bridge that is the most prominent way to cross the river in the entire region though it tends to disappear from time to time as we saw in Scene 23. So better hurry up when crossing it.
    • Behind the left bridge gateway we can see pink trees and orange lands, which borders the sequoia forest as we can see in the second and third picture.
    • They also show a single Aela house standing near the gateway and high mountains in the background just as we would expect them to be there from Scene 14.
    • The last picture completely turns its back on the lake and looks along the river. We can see the first guardian statue behind the bridge and the first houses of the town further down the river.
    • There’s also a single house next to the right bridge gateway, but this time it looks Pyrian. It was at no time present in Scene 23, but I think we already got used to that kind of magic.
    • Right of the gateway you can see some of the volcanic spires in the background and a flat mountain or hill on the horizon which should be the map limitation seen in the right of Scene 23
    • If we pretended to set foot on the bridge and wander through its left gateway, we eventually might turn up at the next location.

    The Mausoleum

    [Scene 13 (0:47), Screenshot 8, Screenshot 7, Screenshot 6]
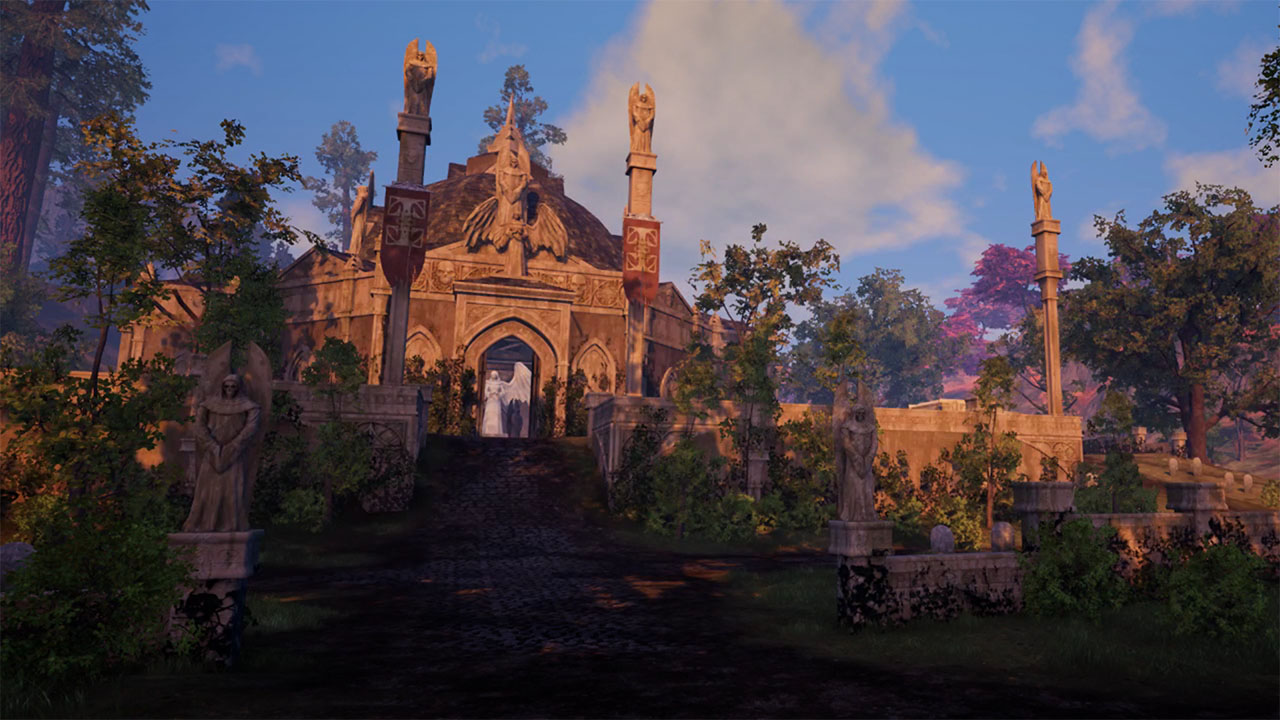
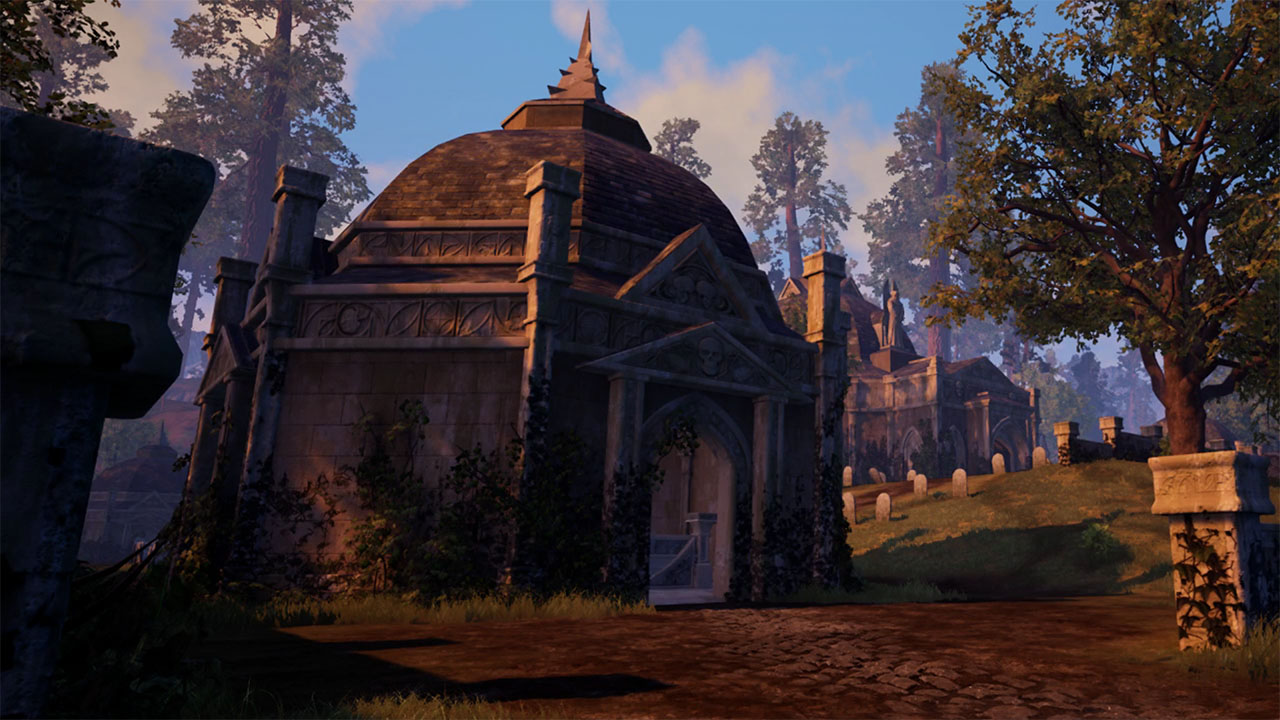
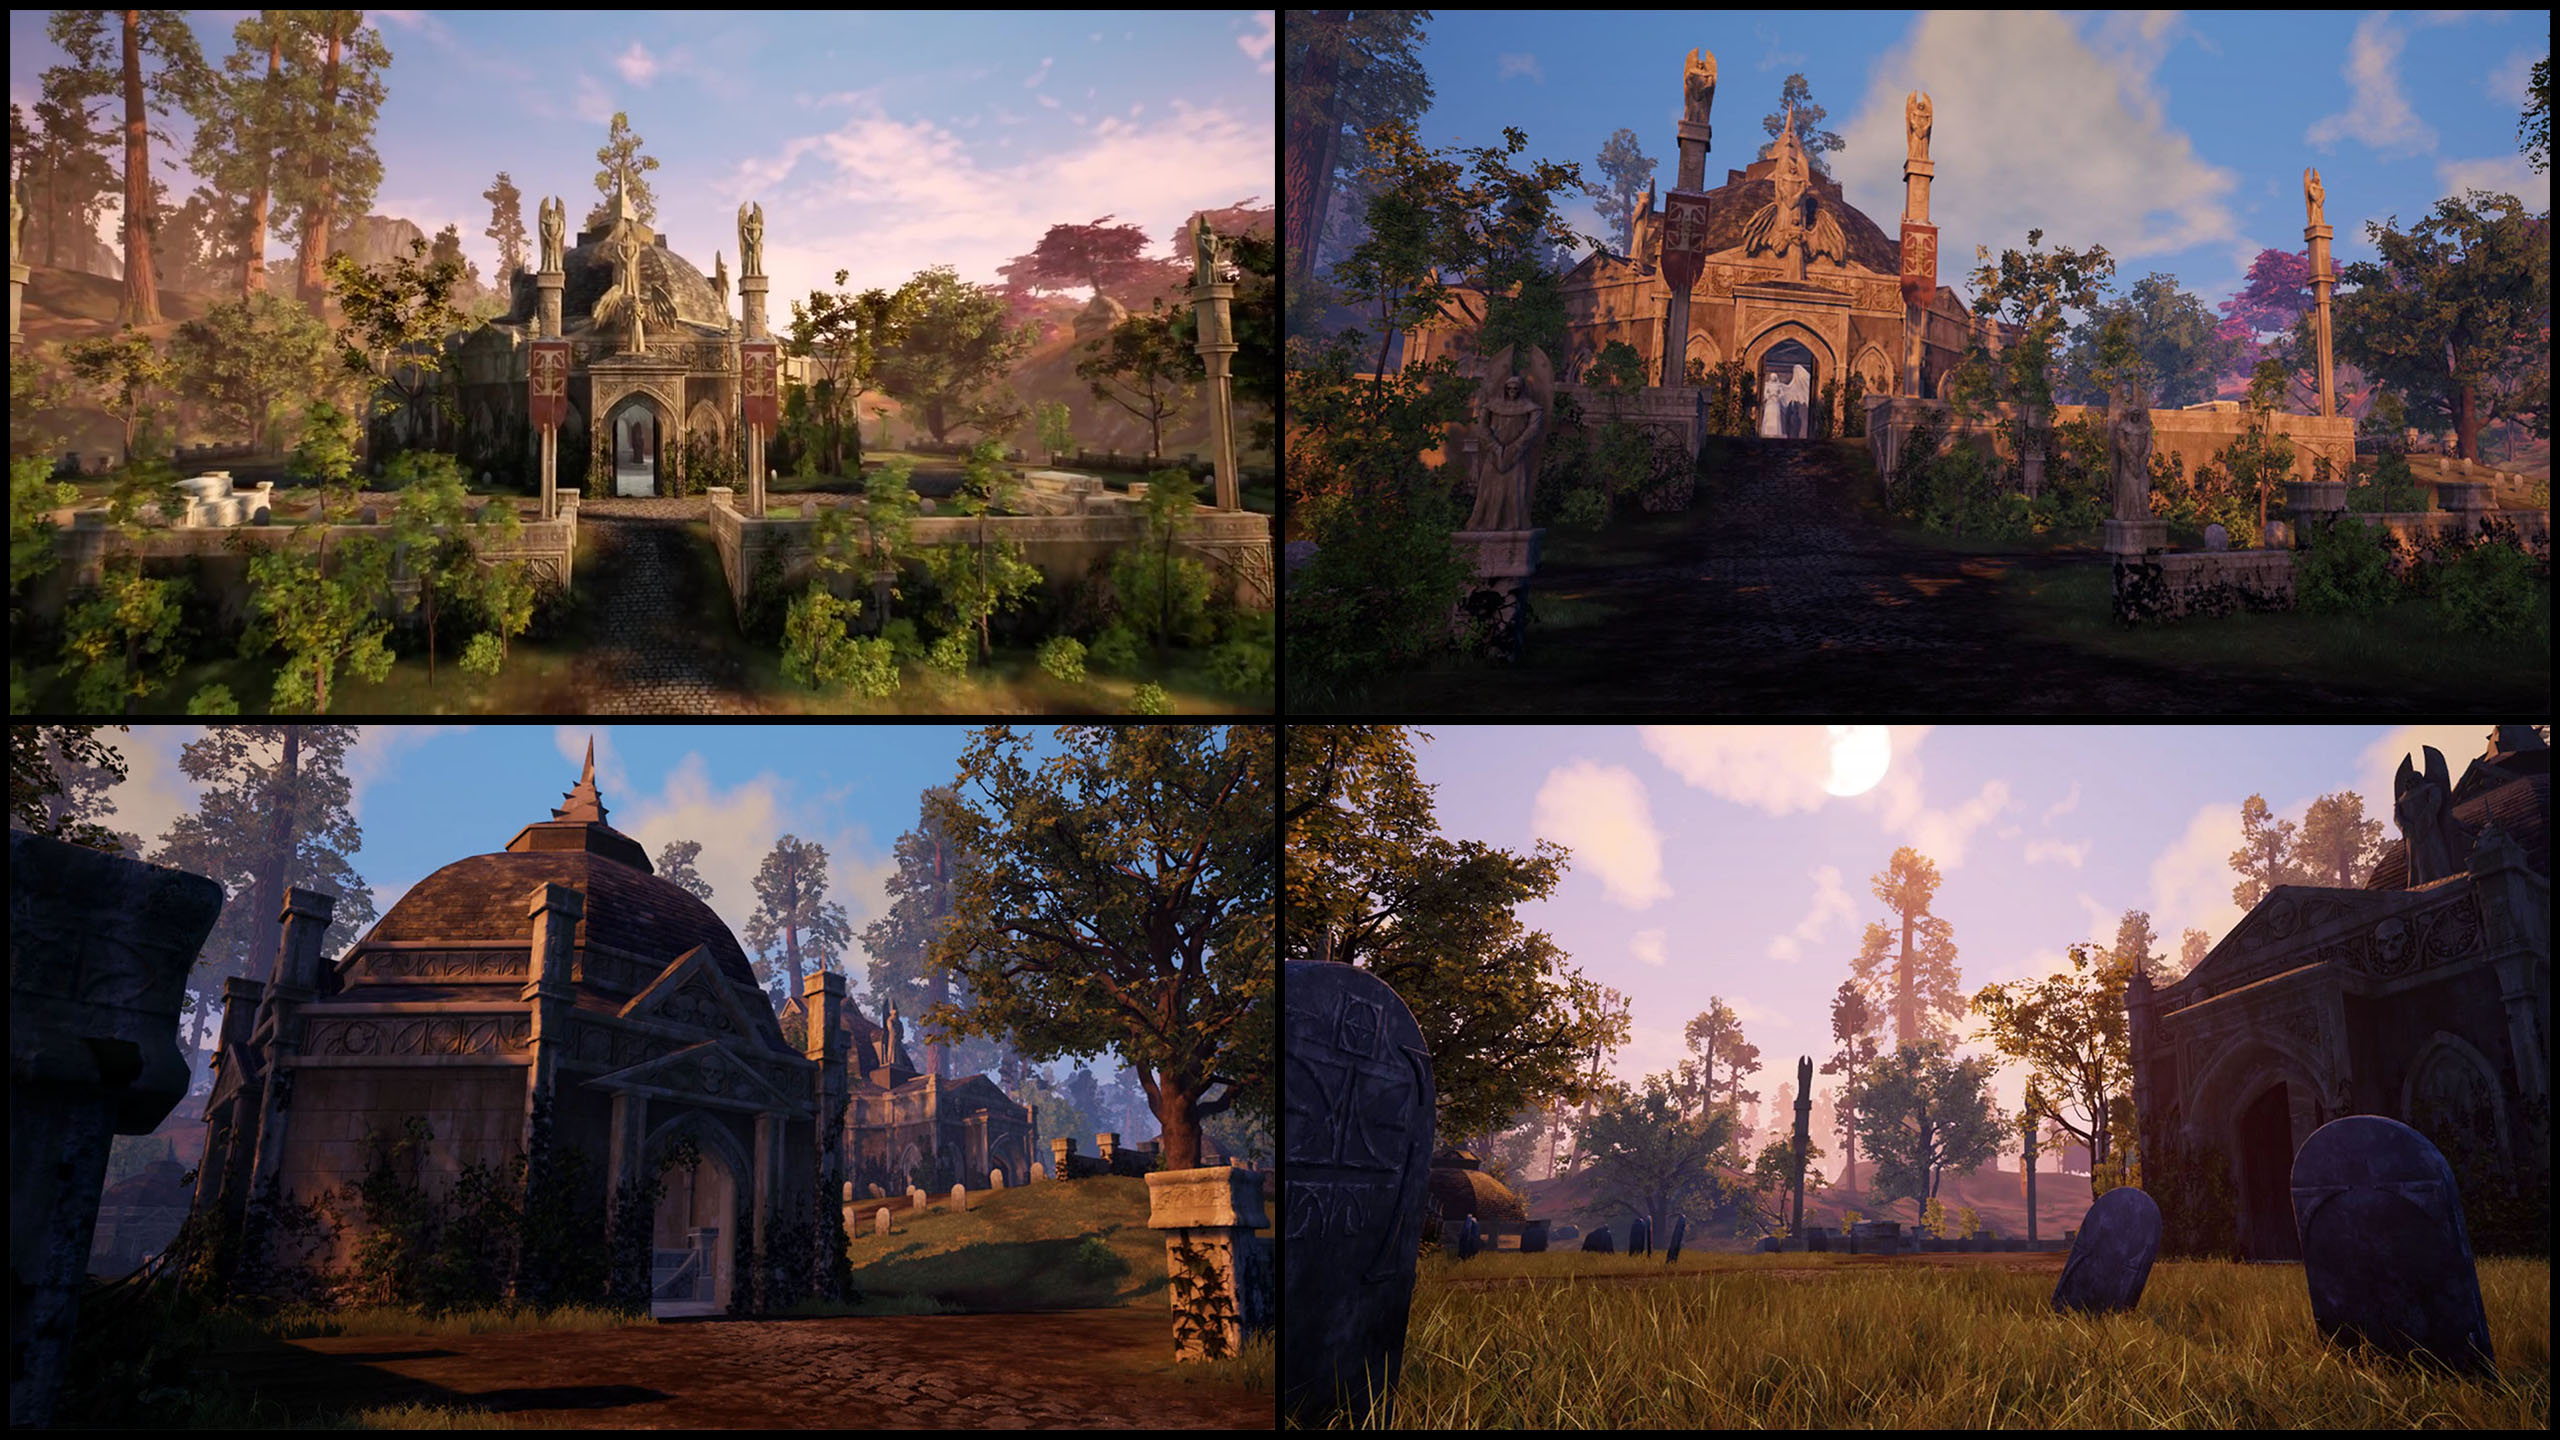
    • As the first two pictures show this grandiose mausoleum and its surrounding cemetery are situated between the sequoia forest and the orange land. The exact position along that border is hard to determine, but considering the snowless mountain in the back is neither close nor terribly far away the position on the map should be around where I put it.
    • It’s interesting how the lighting differs between the video scene and the three screenshots. The decreasing light definitely creates a totally different atmosphere.
    • The third and forth picture show there’s a lot of graves and probably four little crypts arranged around the mausoleum.
    • What bothers me a bit is the position of the sun in the last picture combined with the sequoia trees in the back. If the sun was where I put it we should see pink and orange. But maybe this sun wanders faster than our terrestrial one or the Gods changed its position between taking the screenshots and the video. We better get going before I start overthinking this.

    The Orange Lands

    [Scene 11 (0:40), Scene 17 (1:03), Scene 35 (1:57)]
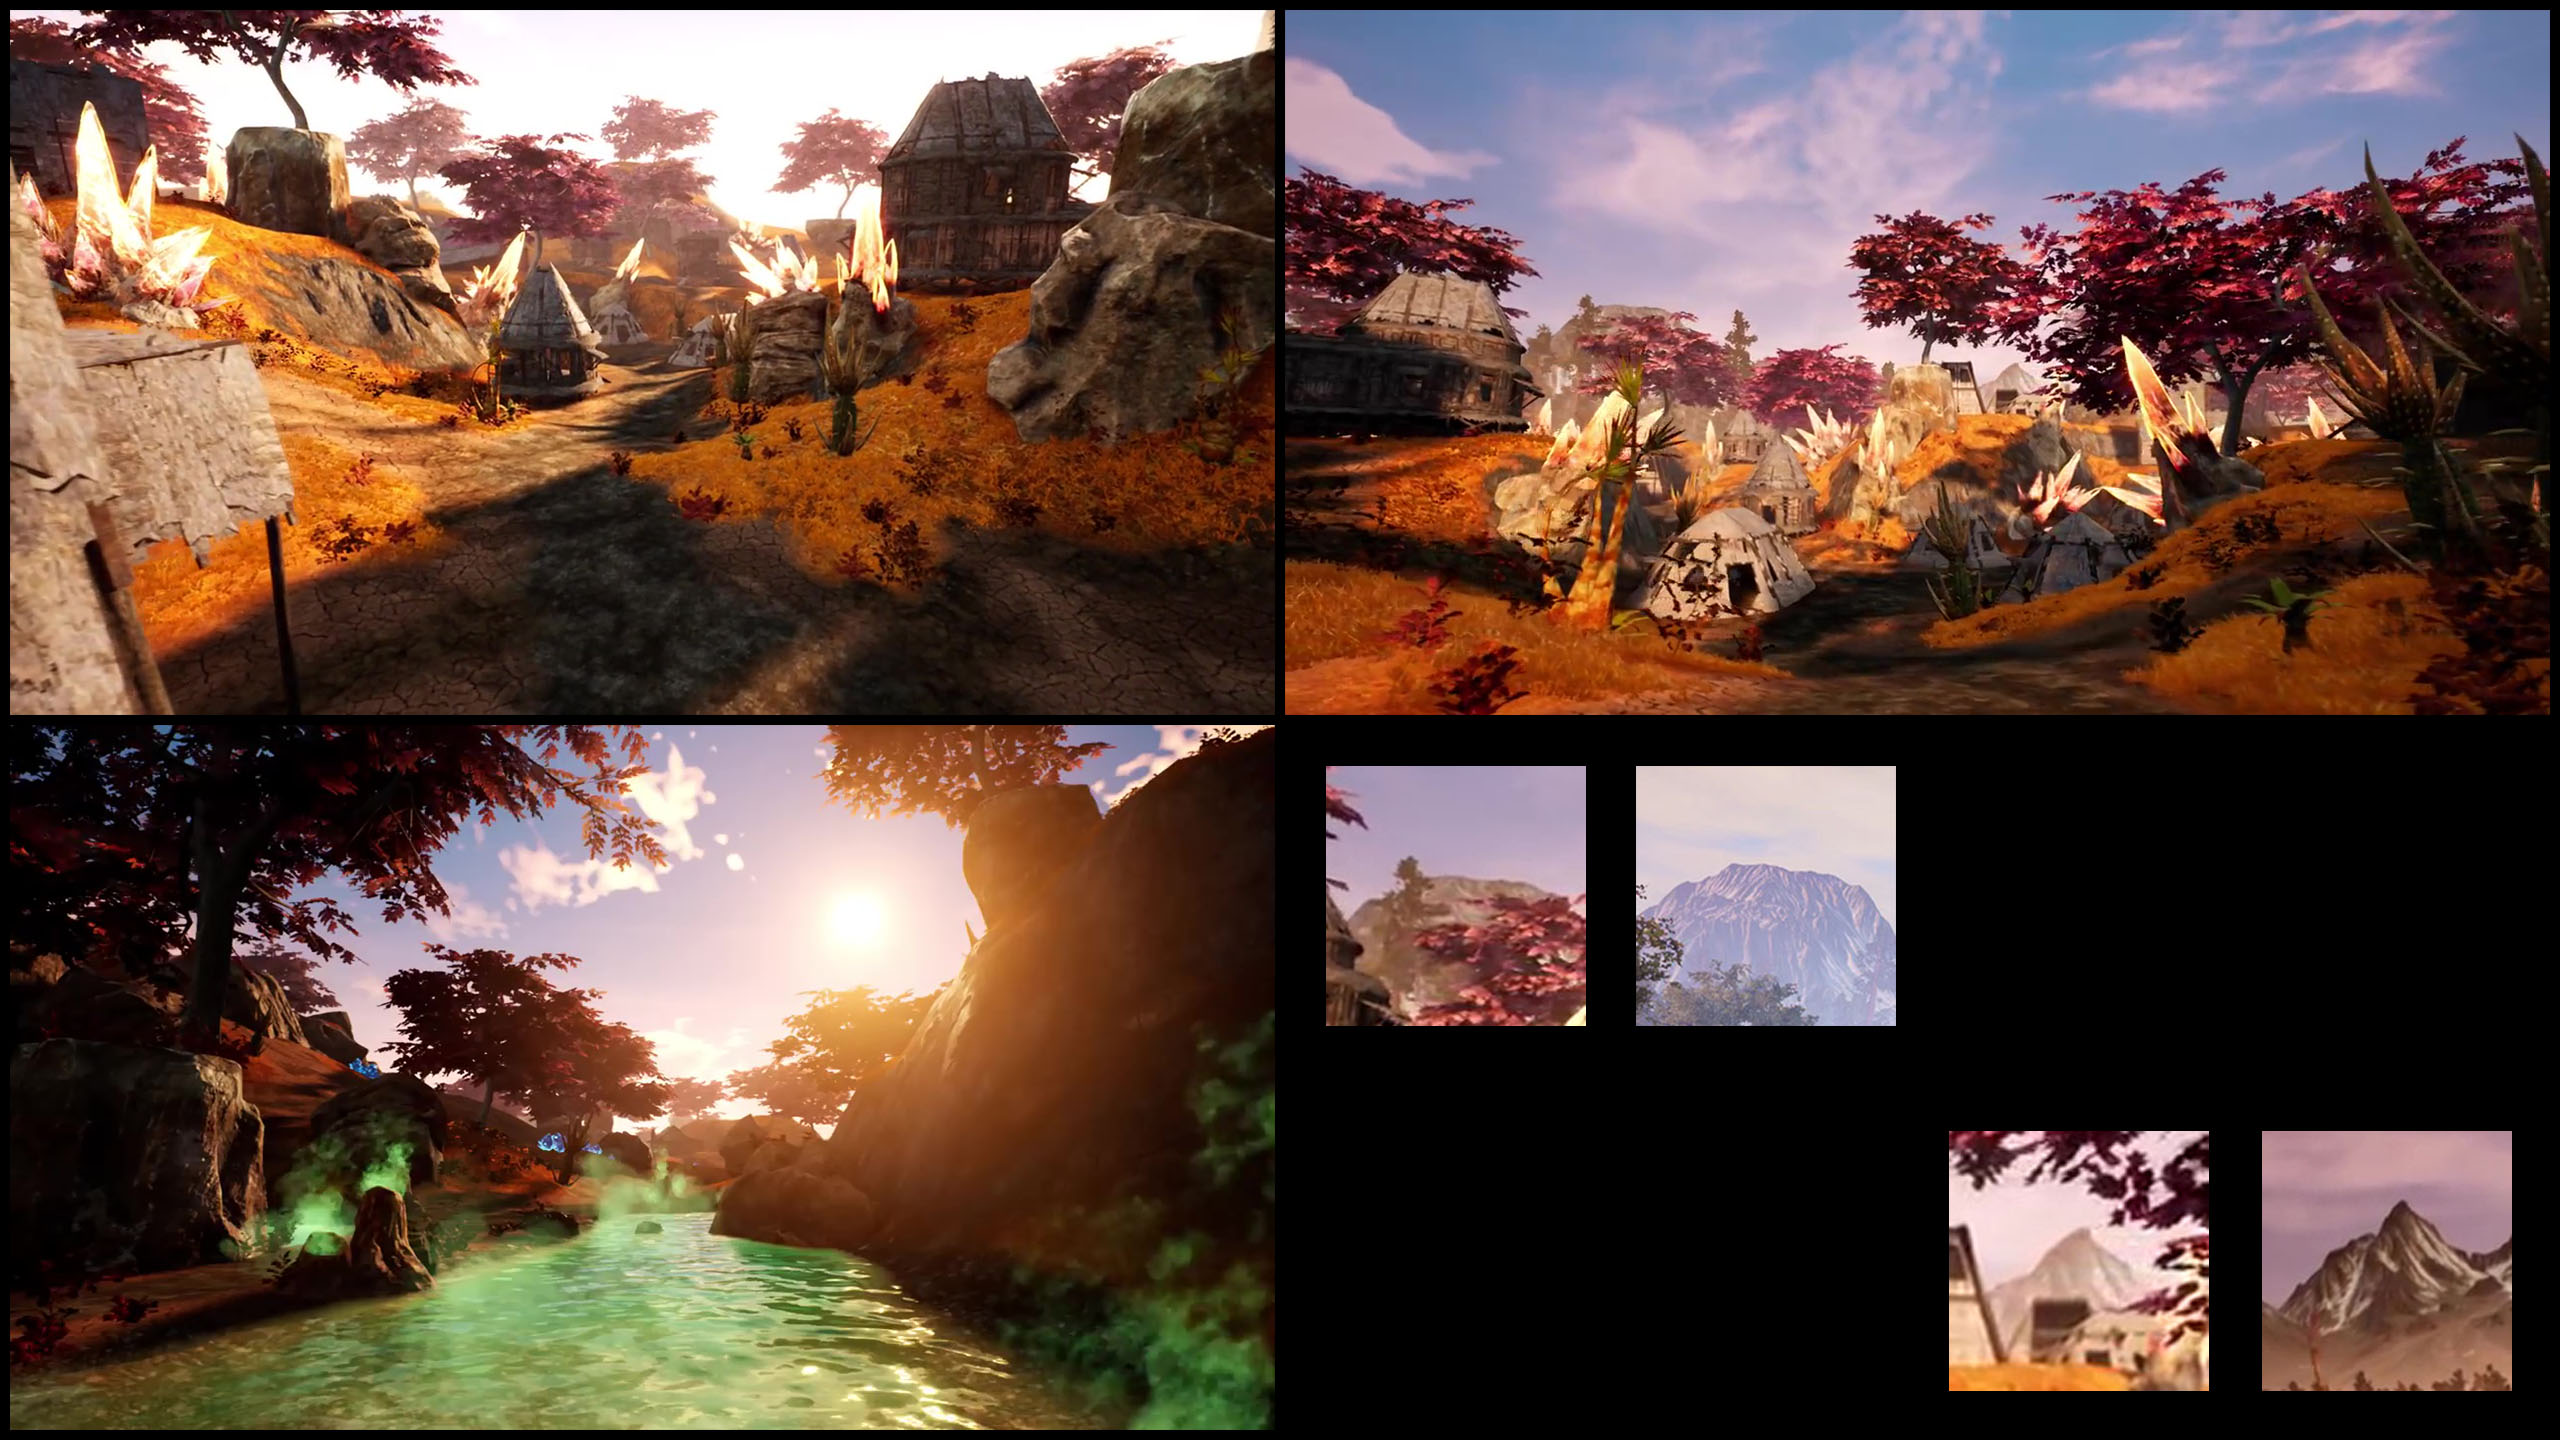
    • With the orange lands somehow right around the corner we pay it a quick visit and it reveals more strange things other than the odd coloring of ground and trees. Glowing crystals seem just as usual as ordinary stone and trees growing out of the rock are a thing here too.
    • The third picture shows that not all the orange lands look the same though strong colors are obligatory. In this scene the glowing crystals are replaced by blue glowing plants or mushrooms which look friendlier than the green gas that emanates from the geysers and floats on the creek.
    • If you look closely you’ll notice a building in extension of the creek that doesn’t look orcish but human. It could be the one marked on the left side of Scene 23, though there’s other scenes that show human housings in the orange lands.
    • The first two pictures show the same village from different sides. The various housings made of wood and leather should be home to Kaivek orcs. While in the first picture we face left of the sun the second from the exact opposite direction shows some sequoias and mountains in the back what matches our general idea of the area, but could place the village anywhere there.
    • However I took a much closer look at the two mountain tops, drew some comparisons and found matches in Scene 14 and Screenshot 4. Unfortunately this allows for no exact locating either, but should place the village roughly in the middle of the orange lands.
    • As that’s rather speculative we hurry back to the bridge before anyone notice.

    The Town

    [Scene 01 (0:07), Scene 15 (0:55), Scene 42 (2:10), Screenshot 4]
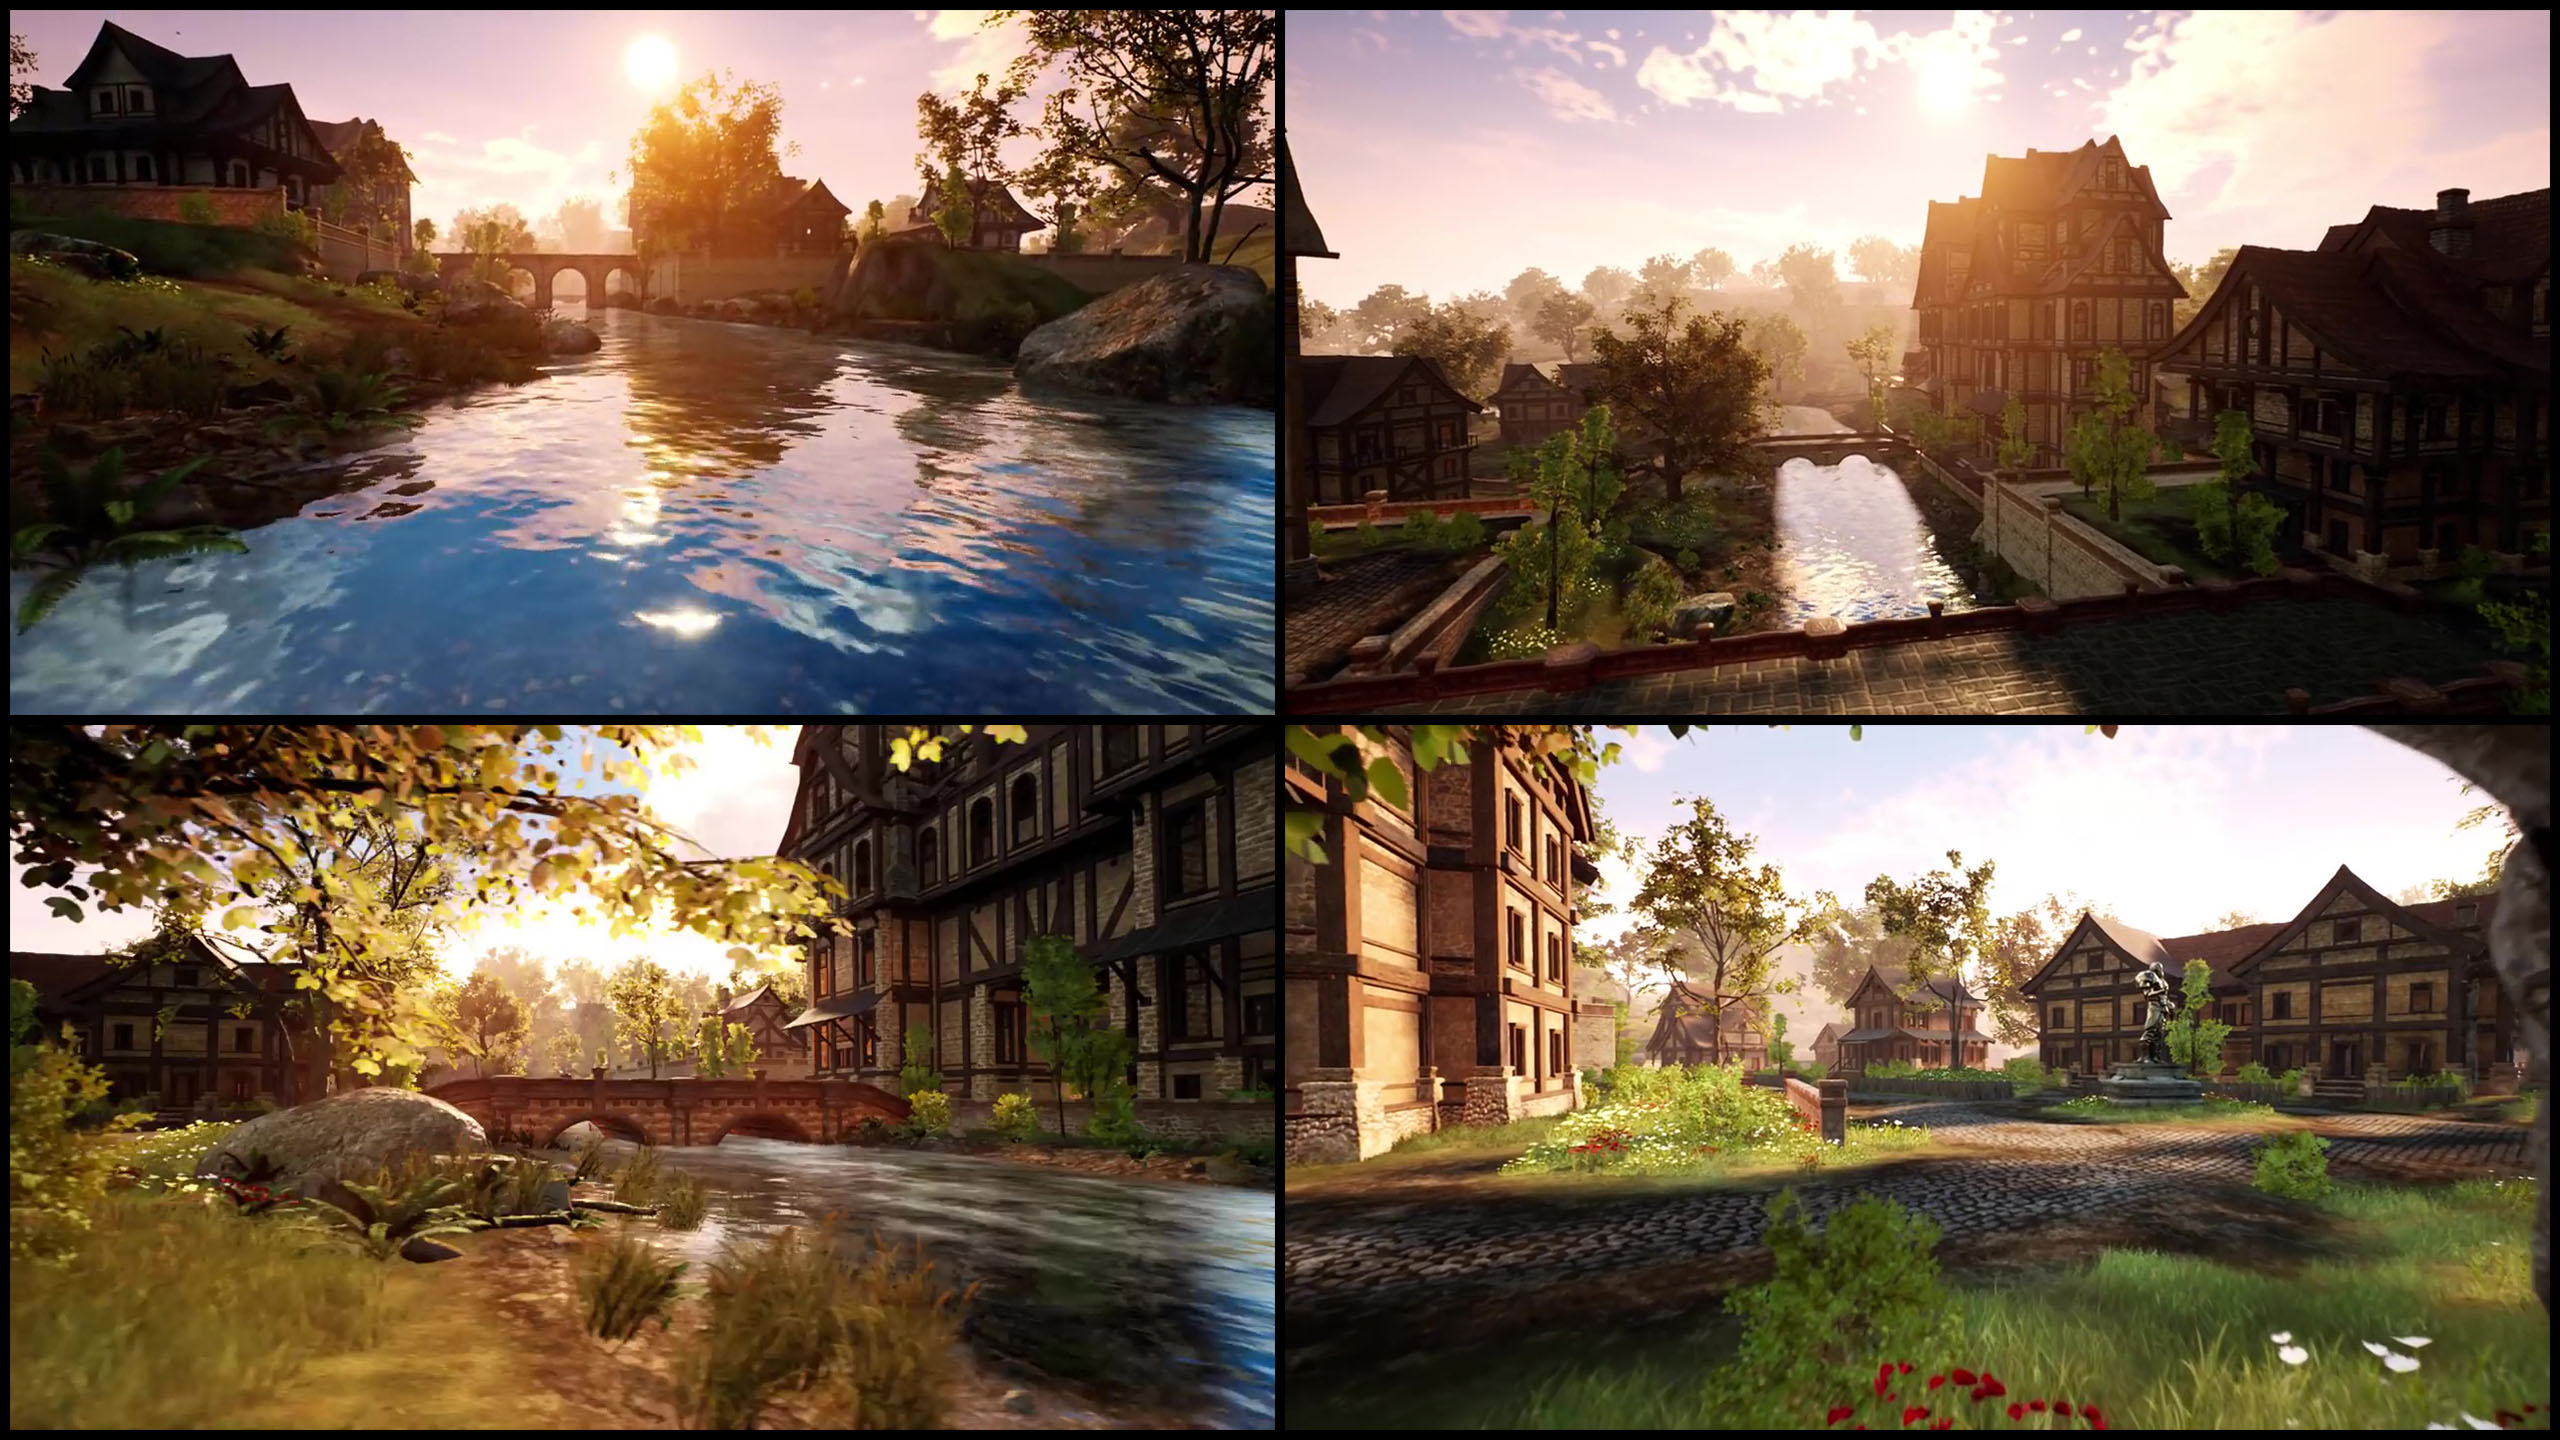
    • The first picture is from the starting scene and was our first view of Alpha 1. Knowing the pendant bridge is right above our heads or the lake village just behind us, it’s almost an unspectacular first glance along the river showing only some pink trees up the slope to the left and 2 houses of the town at the end of the river. The statue at the top right is well hidden behind a tree.
    • The second picture rows us some further down the river revealing a bit more of the statue and a bridge inside the town that connects the houses on the left side with others on the right.
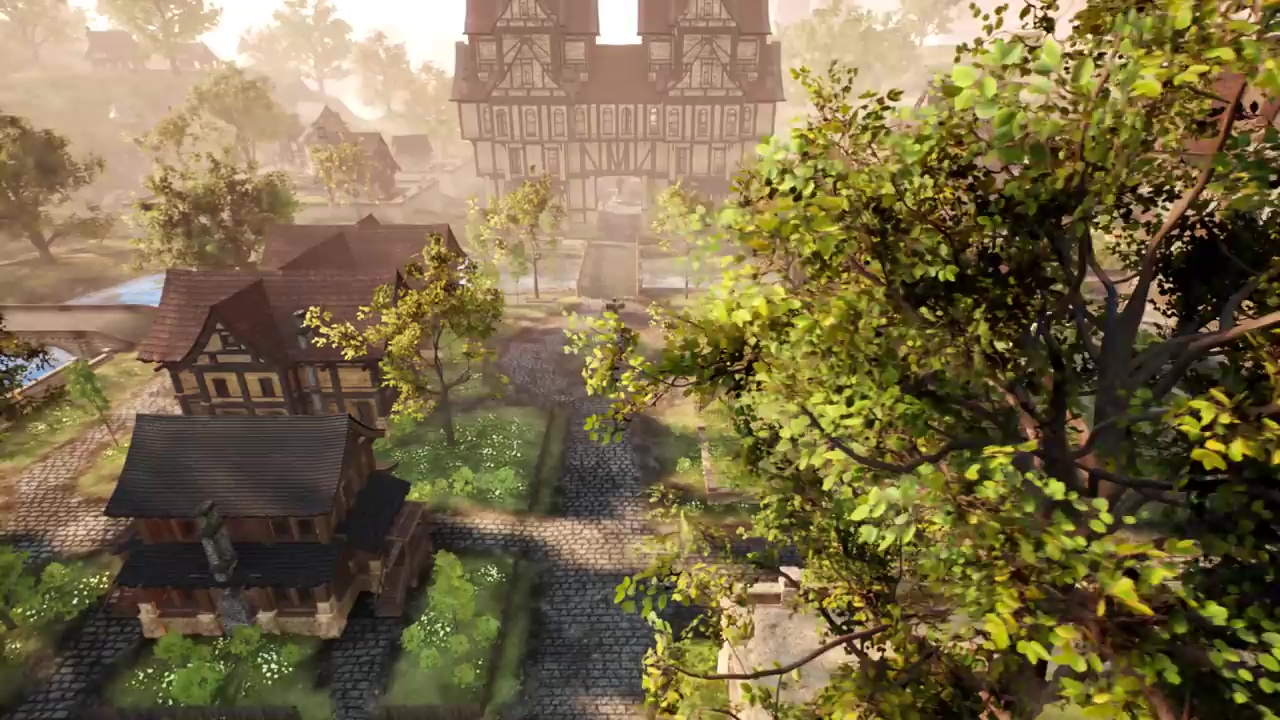
    • In the third picture our viewpoint rose what gives us the best view of one of the guardian statues in this preview. Seeing mainly its back we still don’t get a good impression of its posture or what it’s doing with its arms.
    • There are two more houses visible in the left of the town, but the part above them is more interesting.
    • While the river seems to end somewhere behind the bridge it looks like it’s reappearing in the left, suggesting a bend to the left which we will soon learn really exists.
    • Beyond that left part of the river and hardly visible stands the castle with its defence towers.
    • As we float into the town the last picture let’s us take a look back at the… oh never mind, the bridge is again missing. (As we were told and could see during the stream Ted was working on that one in the background. So maybe that is where the magic’s coming from.)
    • But look, there’s the first close-up of a townhouse! Its architecture could have already been anticipated at a distance, but now we clearly see its an Aela housing that is wholly enclosed by a stone wall.
    • To the left of its roof we can spot another roof in the orange lands that doesn’t look much like an orc building.

    [Scene 02 (0:13), Scene 09 (0:32), Scene 41 (2:08),Scene 10 (0:36)]

    • Facing downstream again the first picture shows the same house only now on the left. Together with the one behind it those where the ones we could already see from afar.
    • The bridge connects them to a part of town where houses seem to be build upon a massive foundation.
    • The second picture leaves those buildings behind or at least aside, hopping onto the bridge to find another one just behind it.
    • We also see the river bending to the left in the back like we already knew it and the terrain getting more hilly beyond the town.
    • There’s several houses on the left side of the smaller bridge and a larger tree next to the river that could well be a village oak
    • But what really catches our eyes is the huge building on the right. It will turn out to be the biggest building shown in the entire preview and I’d be surprised if that wasn’t the townhall.
    • In the third picture we jump down to the village oak between both bridges from where we can clearly see the townhall is really one single building and we also see there’s at least one more building behind it.
    • Turning left in the last picture the village oak stands right of us. We discover a placid square with a statue in its centre surrounded by some houses of which the right one is the most noticeable. As it’s wider than the standard residential houses it could well be a tavern.

    [Scene 20 (1:15), Scene 28 (1:43), Scene 38 (2:03), Scene 19 (1:11)]

    • In the first picture we strolled across the beautiful plaza and now face the other direction. We can see the same surrounding houses, the statue and the village tree by the river where we just stood.
    • We see the townhall in all its glory and a passageway through it that reveals another statue on the other side of the building.
    • We also get a better view of its flanking houses. The right ones standing on the mentioned foundation, the left ones surrounded by stone walls again.
    • If we stare into the distance right of the townhall and atop its neighboring building we can see another small building that could be part of the farm and may even be able to perceive at least one of the volcanic spires.
    • What this picture isn’t showing from the very beginning of Scene 20 is a third bridge left of the tavern, crossing the river after its bend and two houses that appear in the hills adjacent to the town in the upper left corner.
    • In the second picture we change sides of the townhall to discover it was hiding some more houses from us.
    • We’re facing the townhall statue and to its right foot (left from our point of view) through the passageway we can barely see its twin on the square.
    • In the third picture we turned left at the statue and walked up the foundationed area to look back towards the townhall again.
    • Now that we’ve ended our sightseeing tour of town we bid farewell, floating further down the river and looking back at the townhall, tavern and houses in the last picture.
    • Where is the bridge behind the tavern you may ask. Well, it’s certainly hidden behind that stone, it’s not like bridges could turn invisible. That would be silly!
    • The river bend is now obvious whereas its splitting might not be seen at first glance. While we ourselves drift towards the castle another branch flows to the right dividing the castle’s realm on our right back from the orange lands that can be spotted at the top right corner.
    • That’s where we see just another non-orcish building on orange ground. They seem much more common than I first thought.
    • What I too didn’t anticipate were the two mountains behind the guardian statue and the townhall as I did not expect there to be such high mountains in the area behind the Pyrian tower. Well, even though I planned this journey by myself it’s still full of surprises.

    The Castle

    [Scene 08 (0:29 ), Scene 34 (1:55), Scene 26 (1:38)]
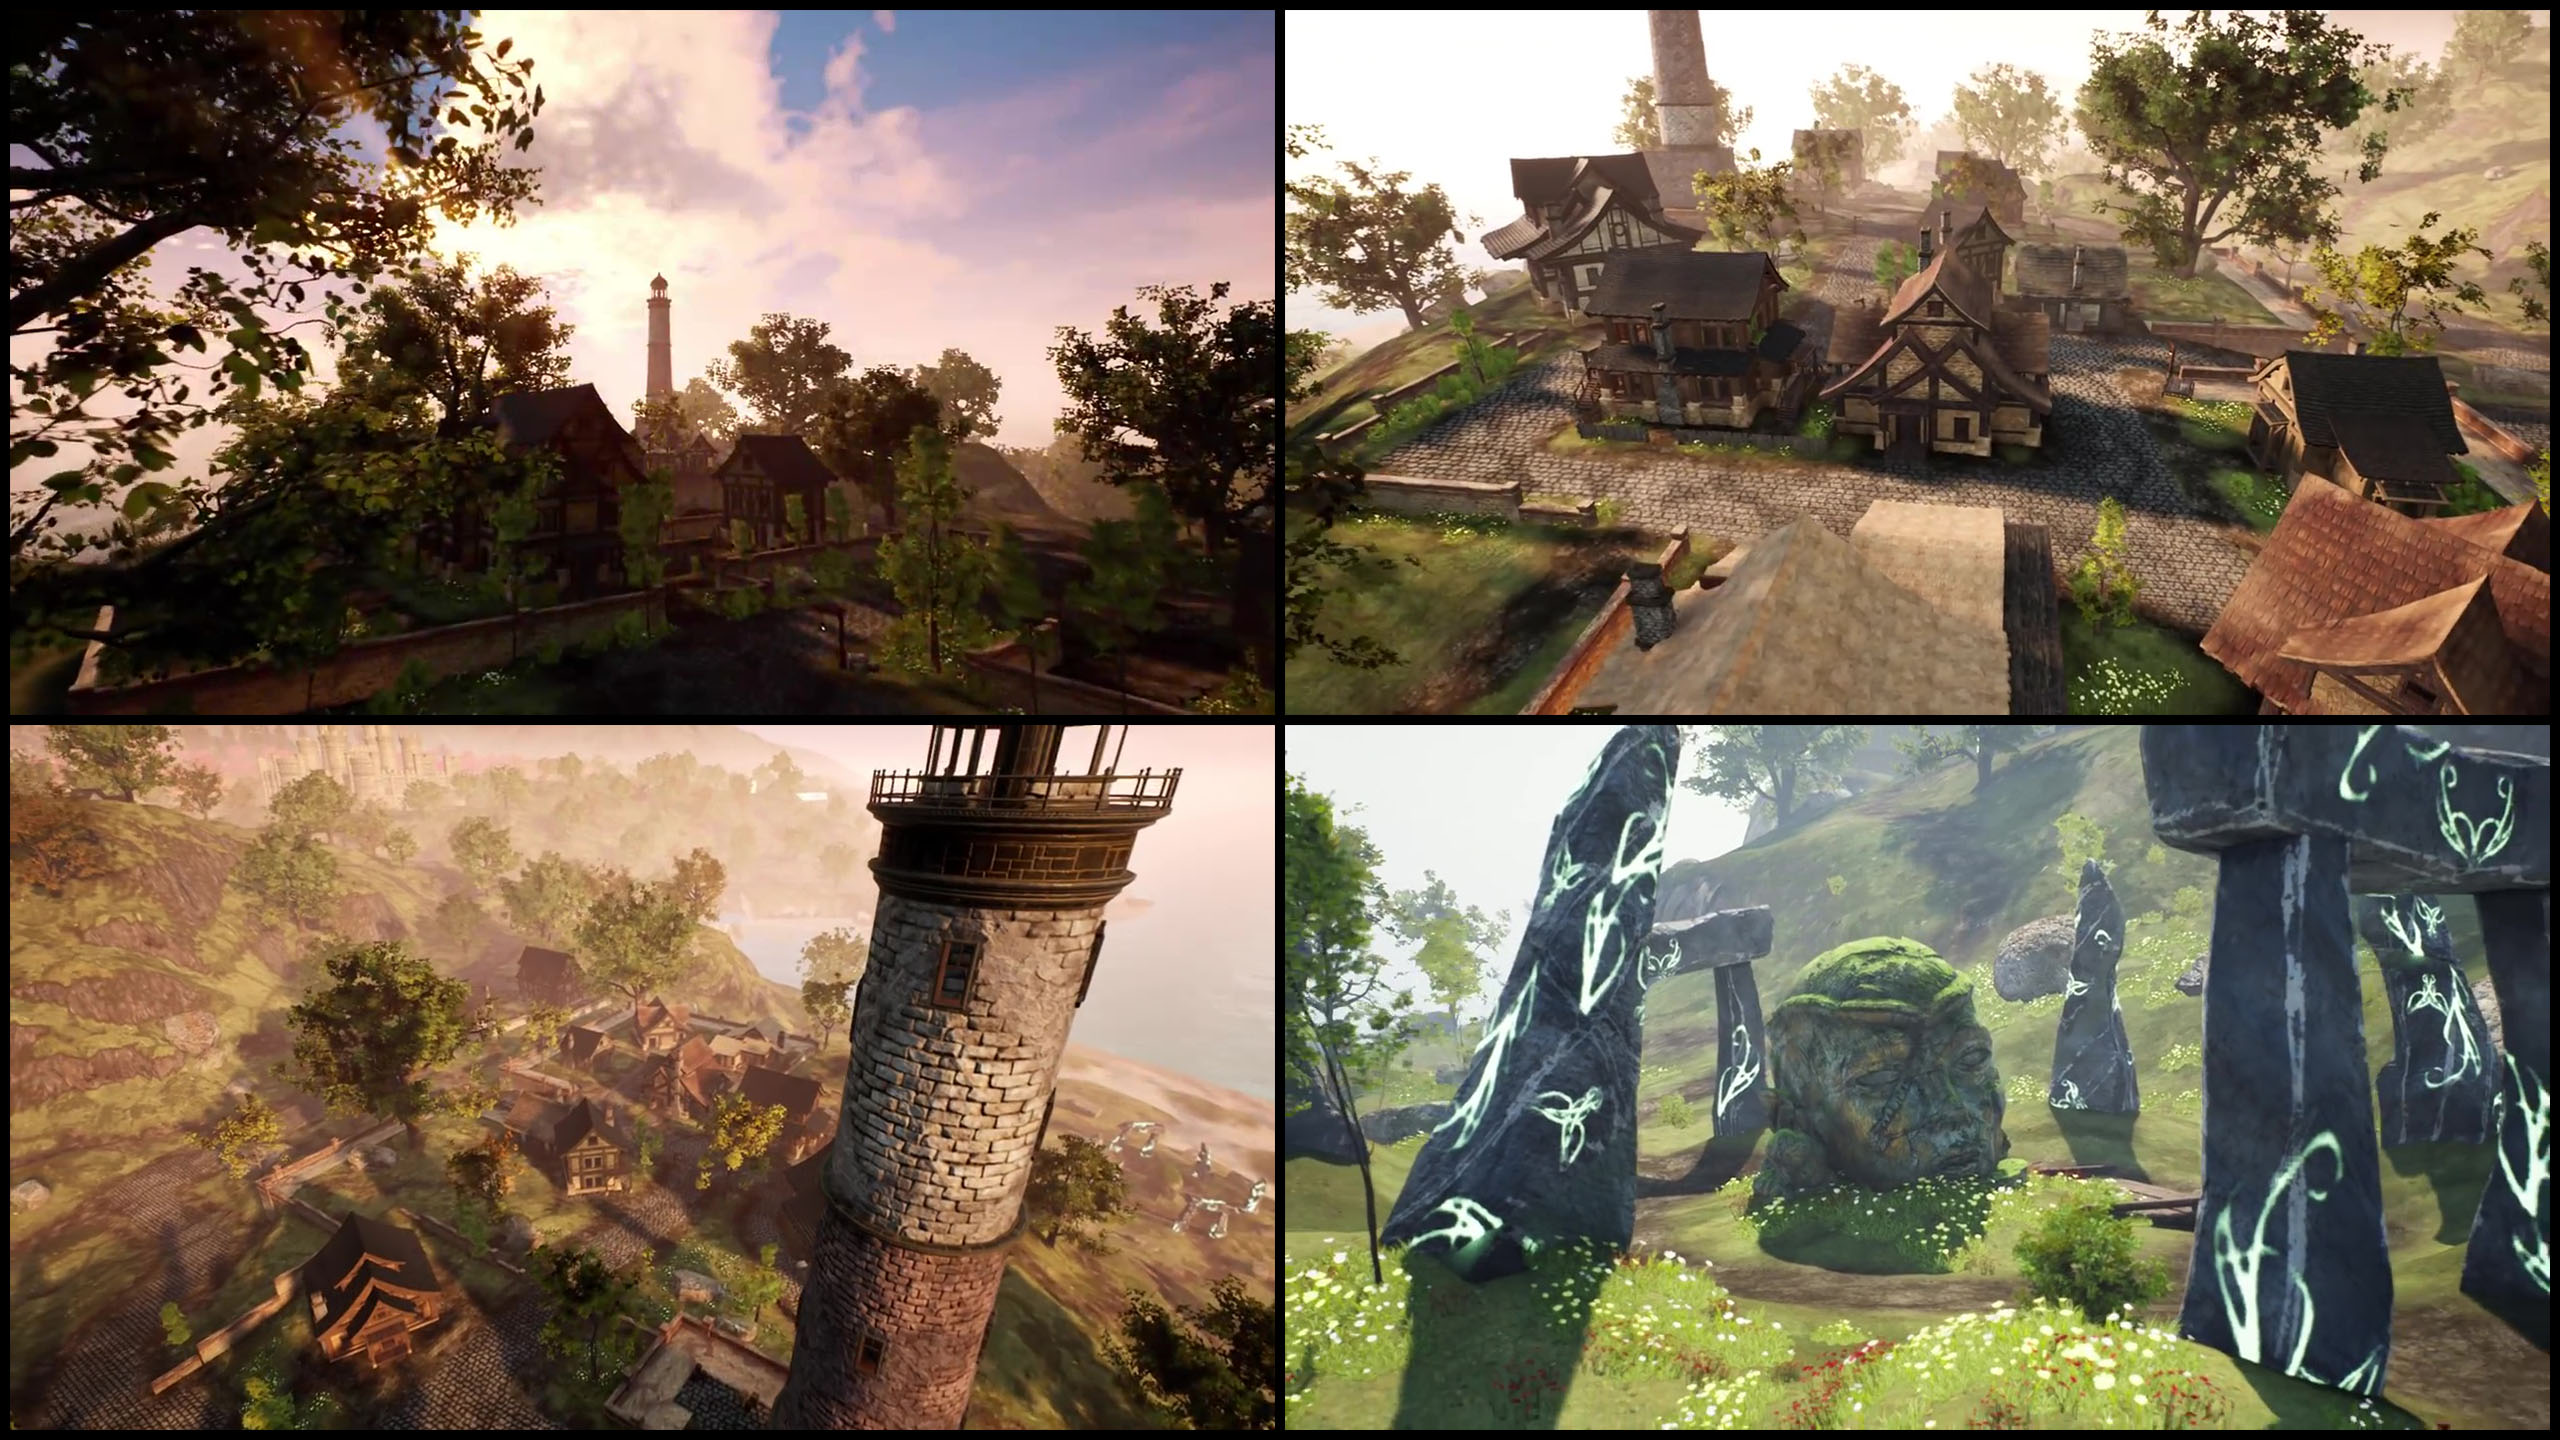
    • In case you couldn’t recognize where the river split up we have now turned around in the first picture facing downstream and along the two branches.
    • Hidden in the trees in front of us stands a single house. To its top left some parts of the statue are visible and to its right lurks a single tower of the castle. We had a much better view of them in Scene 14.
    • What we didn’t see there was a bridge leading to the house, but magic is at work again and we can clearly see it now. Together with the bridge behind the tavern those two are probably connecting castle and town.
    • However instead of passing the bridge, the second picture takes us down the left stream where we get our first closer look at the castle, the orange lands just at our back.
    • To the castle’s right stands its accompanying statue which seems to point towards the town and its fellow there.
    • The last picture takes us around the castle as we can see the orange land behind it now. While other viewpoints made the defence towers arrangement look very random, the right angle makes them perfectly align and reveals the castle’s symmetry.

    The Lighthouse

    [Scene 07 (0:25), Scene 29 (1:45), Scene 30 (1:47), Scene 37 (2:01)]
    • After we leave the castle behind, cross the river over the second bridge that we saw in Scene 14 and climb up some hills we might end up in the first picture.
    • It’s the lighthouse and a few houses in front of it. The one in the left middle is the one I already mentioned in the background of Scene 40.
    • Leaving those 2 marginal houses to our right in the second picture, we have a great overview over the whole village.
    • In the right part there’s foundations like we already seen them in the town, only this time they level out the terrain instead of generating a difference in height.
    • We’ve already seen the third picture and analyzed the scene, but I felt a view from the other side of the village and looking back at the castle and river mouth gives a good impression of where we went from there.
    • It also shows no matter how close we’re to the ocean it’s still a steep walk down to the shore and the other side of the village is also flanked by hills.
    • The fourth picture focuses on the henge on the beach that is arranged around a stone head. Both elements don’t really seem to fit together as the dark monoliths look not as ancient as the head in their middle.
    • The wooden object to its right certainly will turn out to be a trap door that leads down to a dark altar where the people of the village above sacrifice their firstborns to the rageous Ocean God. Yes, that seems plausible.
    • As we don’t want to have anything to do with that, we continue our journey leaving the ocean to our left back and enter the valleys that cut through the hills some more inland.

    The Mushroom Swamp

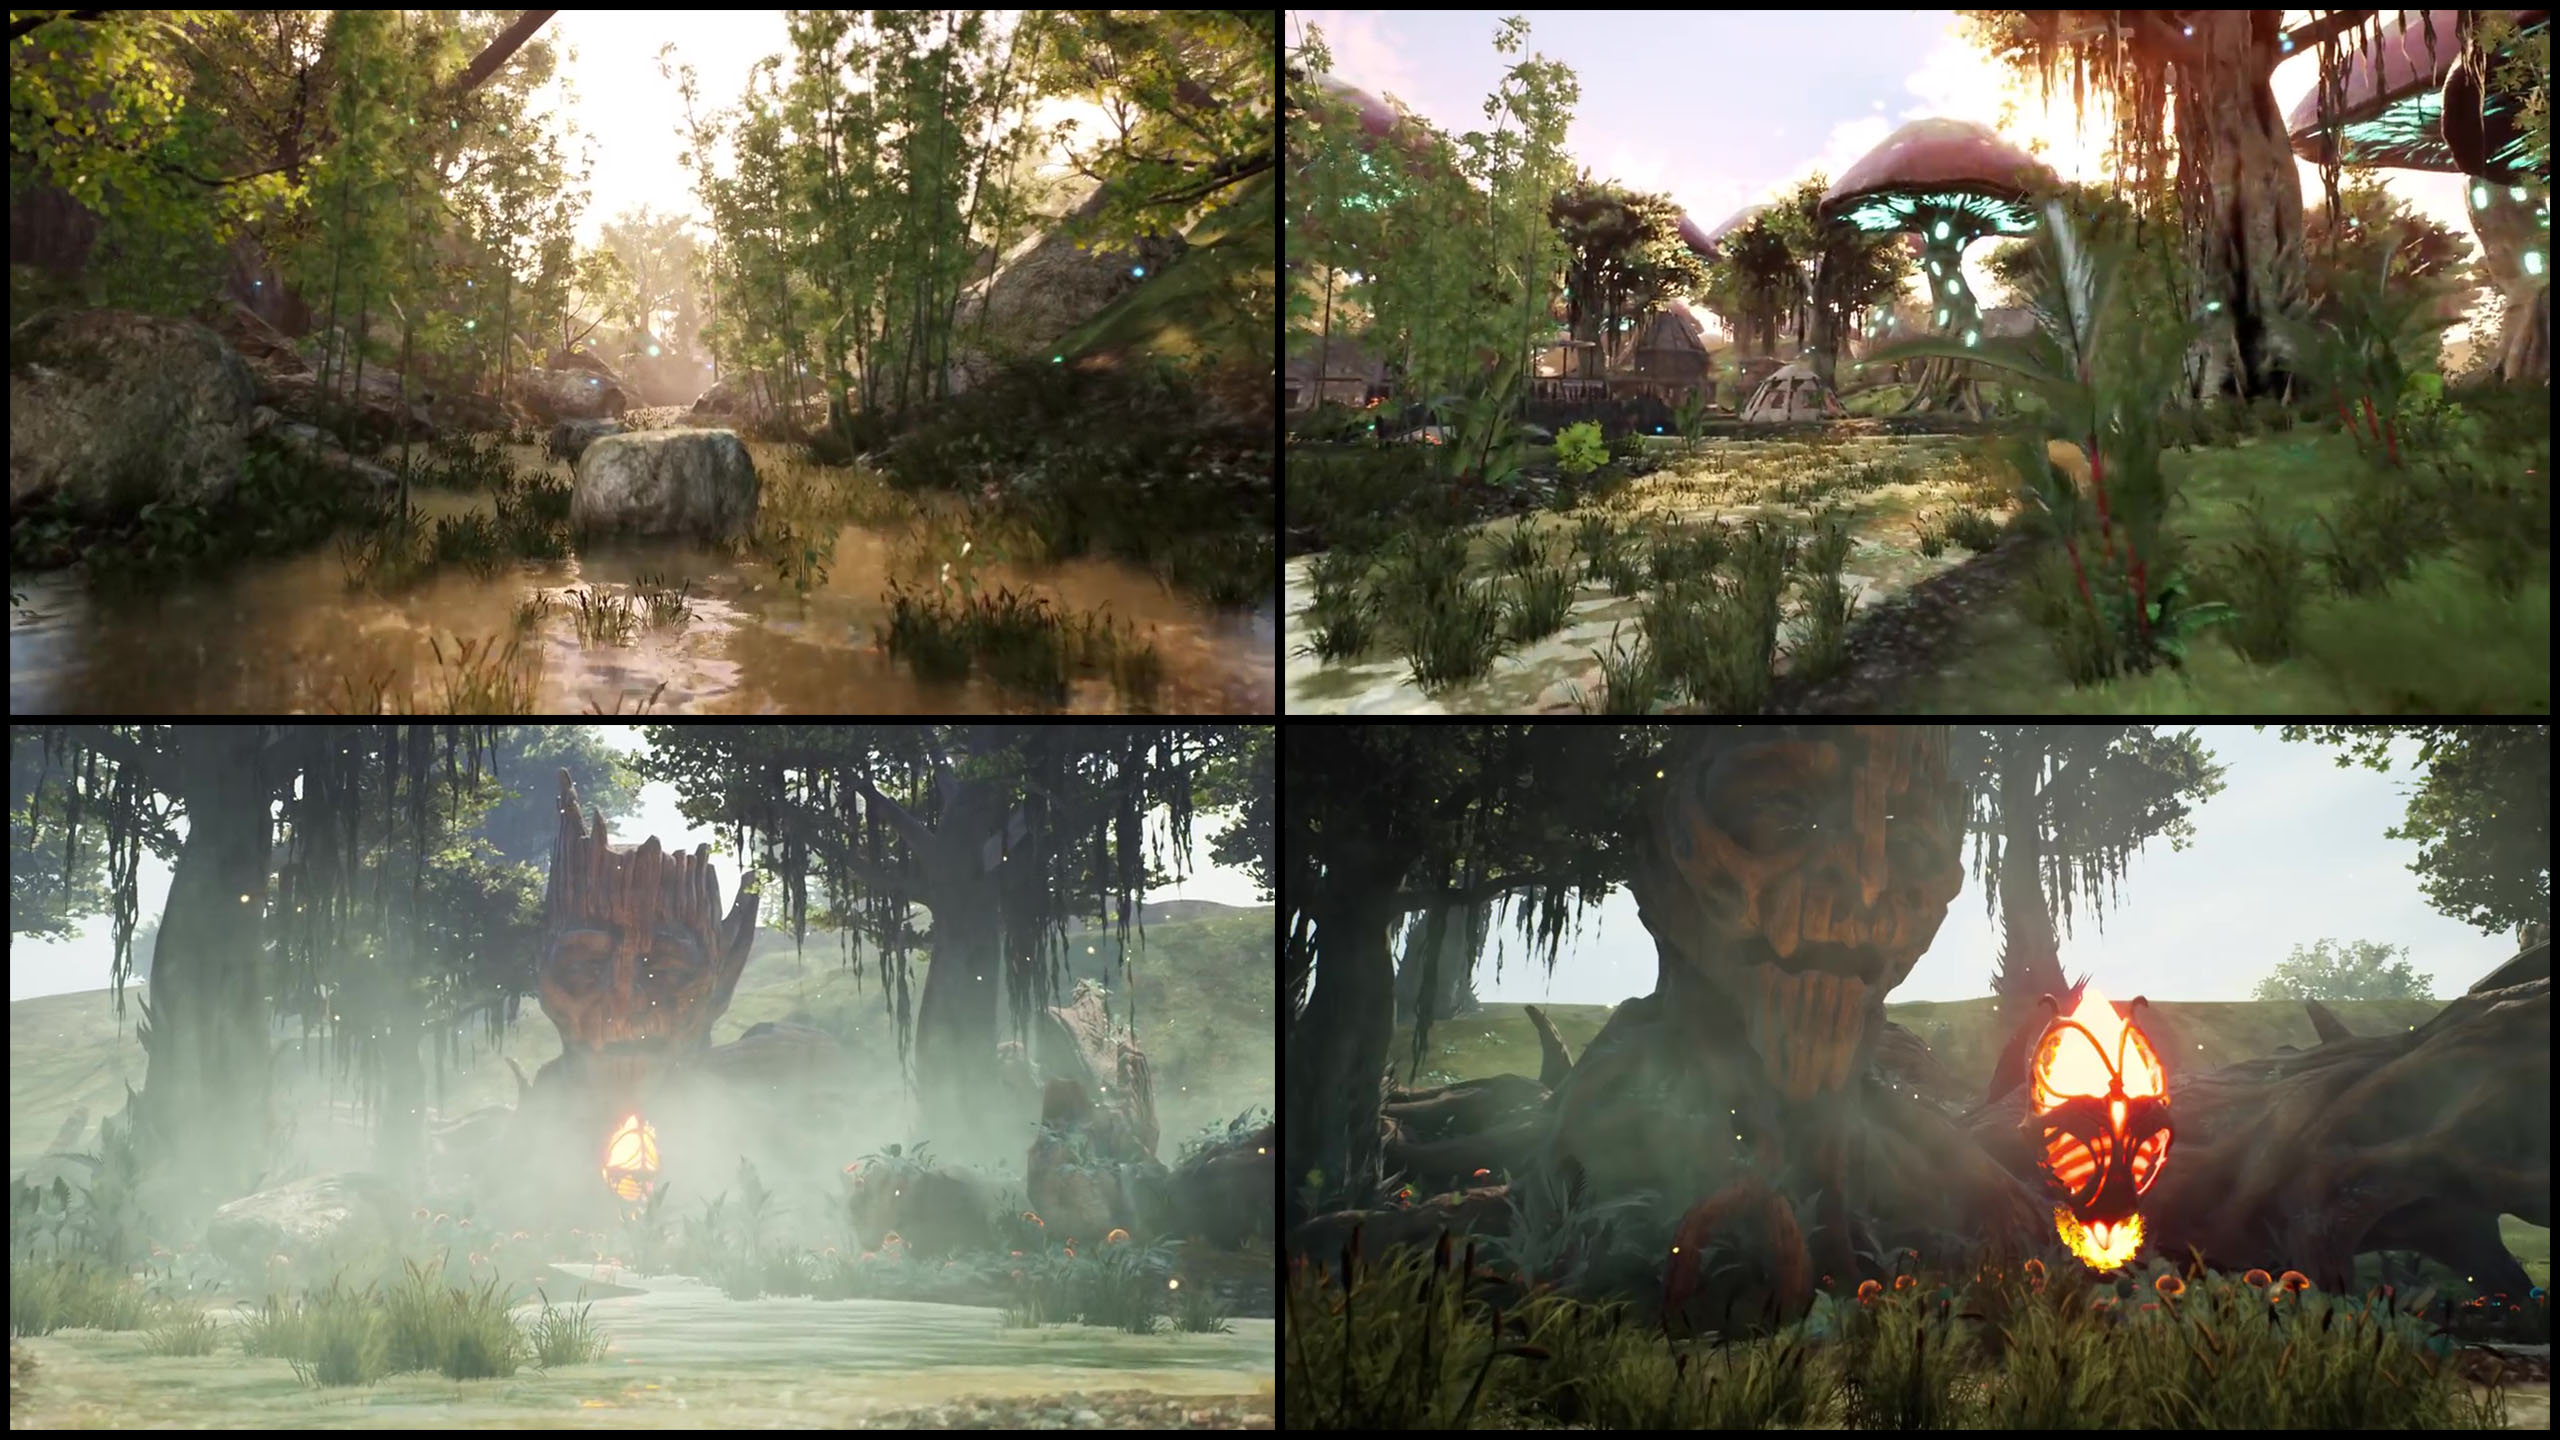
    [Scene 25 (1:34), Scene 24 (1:30), Scene 22 (1:22), Scene 36 (1:59)]

    • First evidence of reaching the swamps are water everywhere around our feet, bamboo thicket at its edge and blue wisps floating around in the air.
    • The bridge spanning over the valley is one of those we saw in Scene 40.
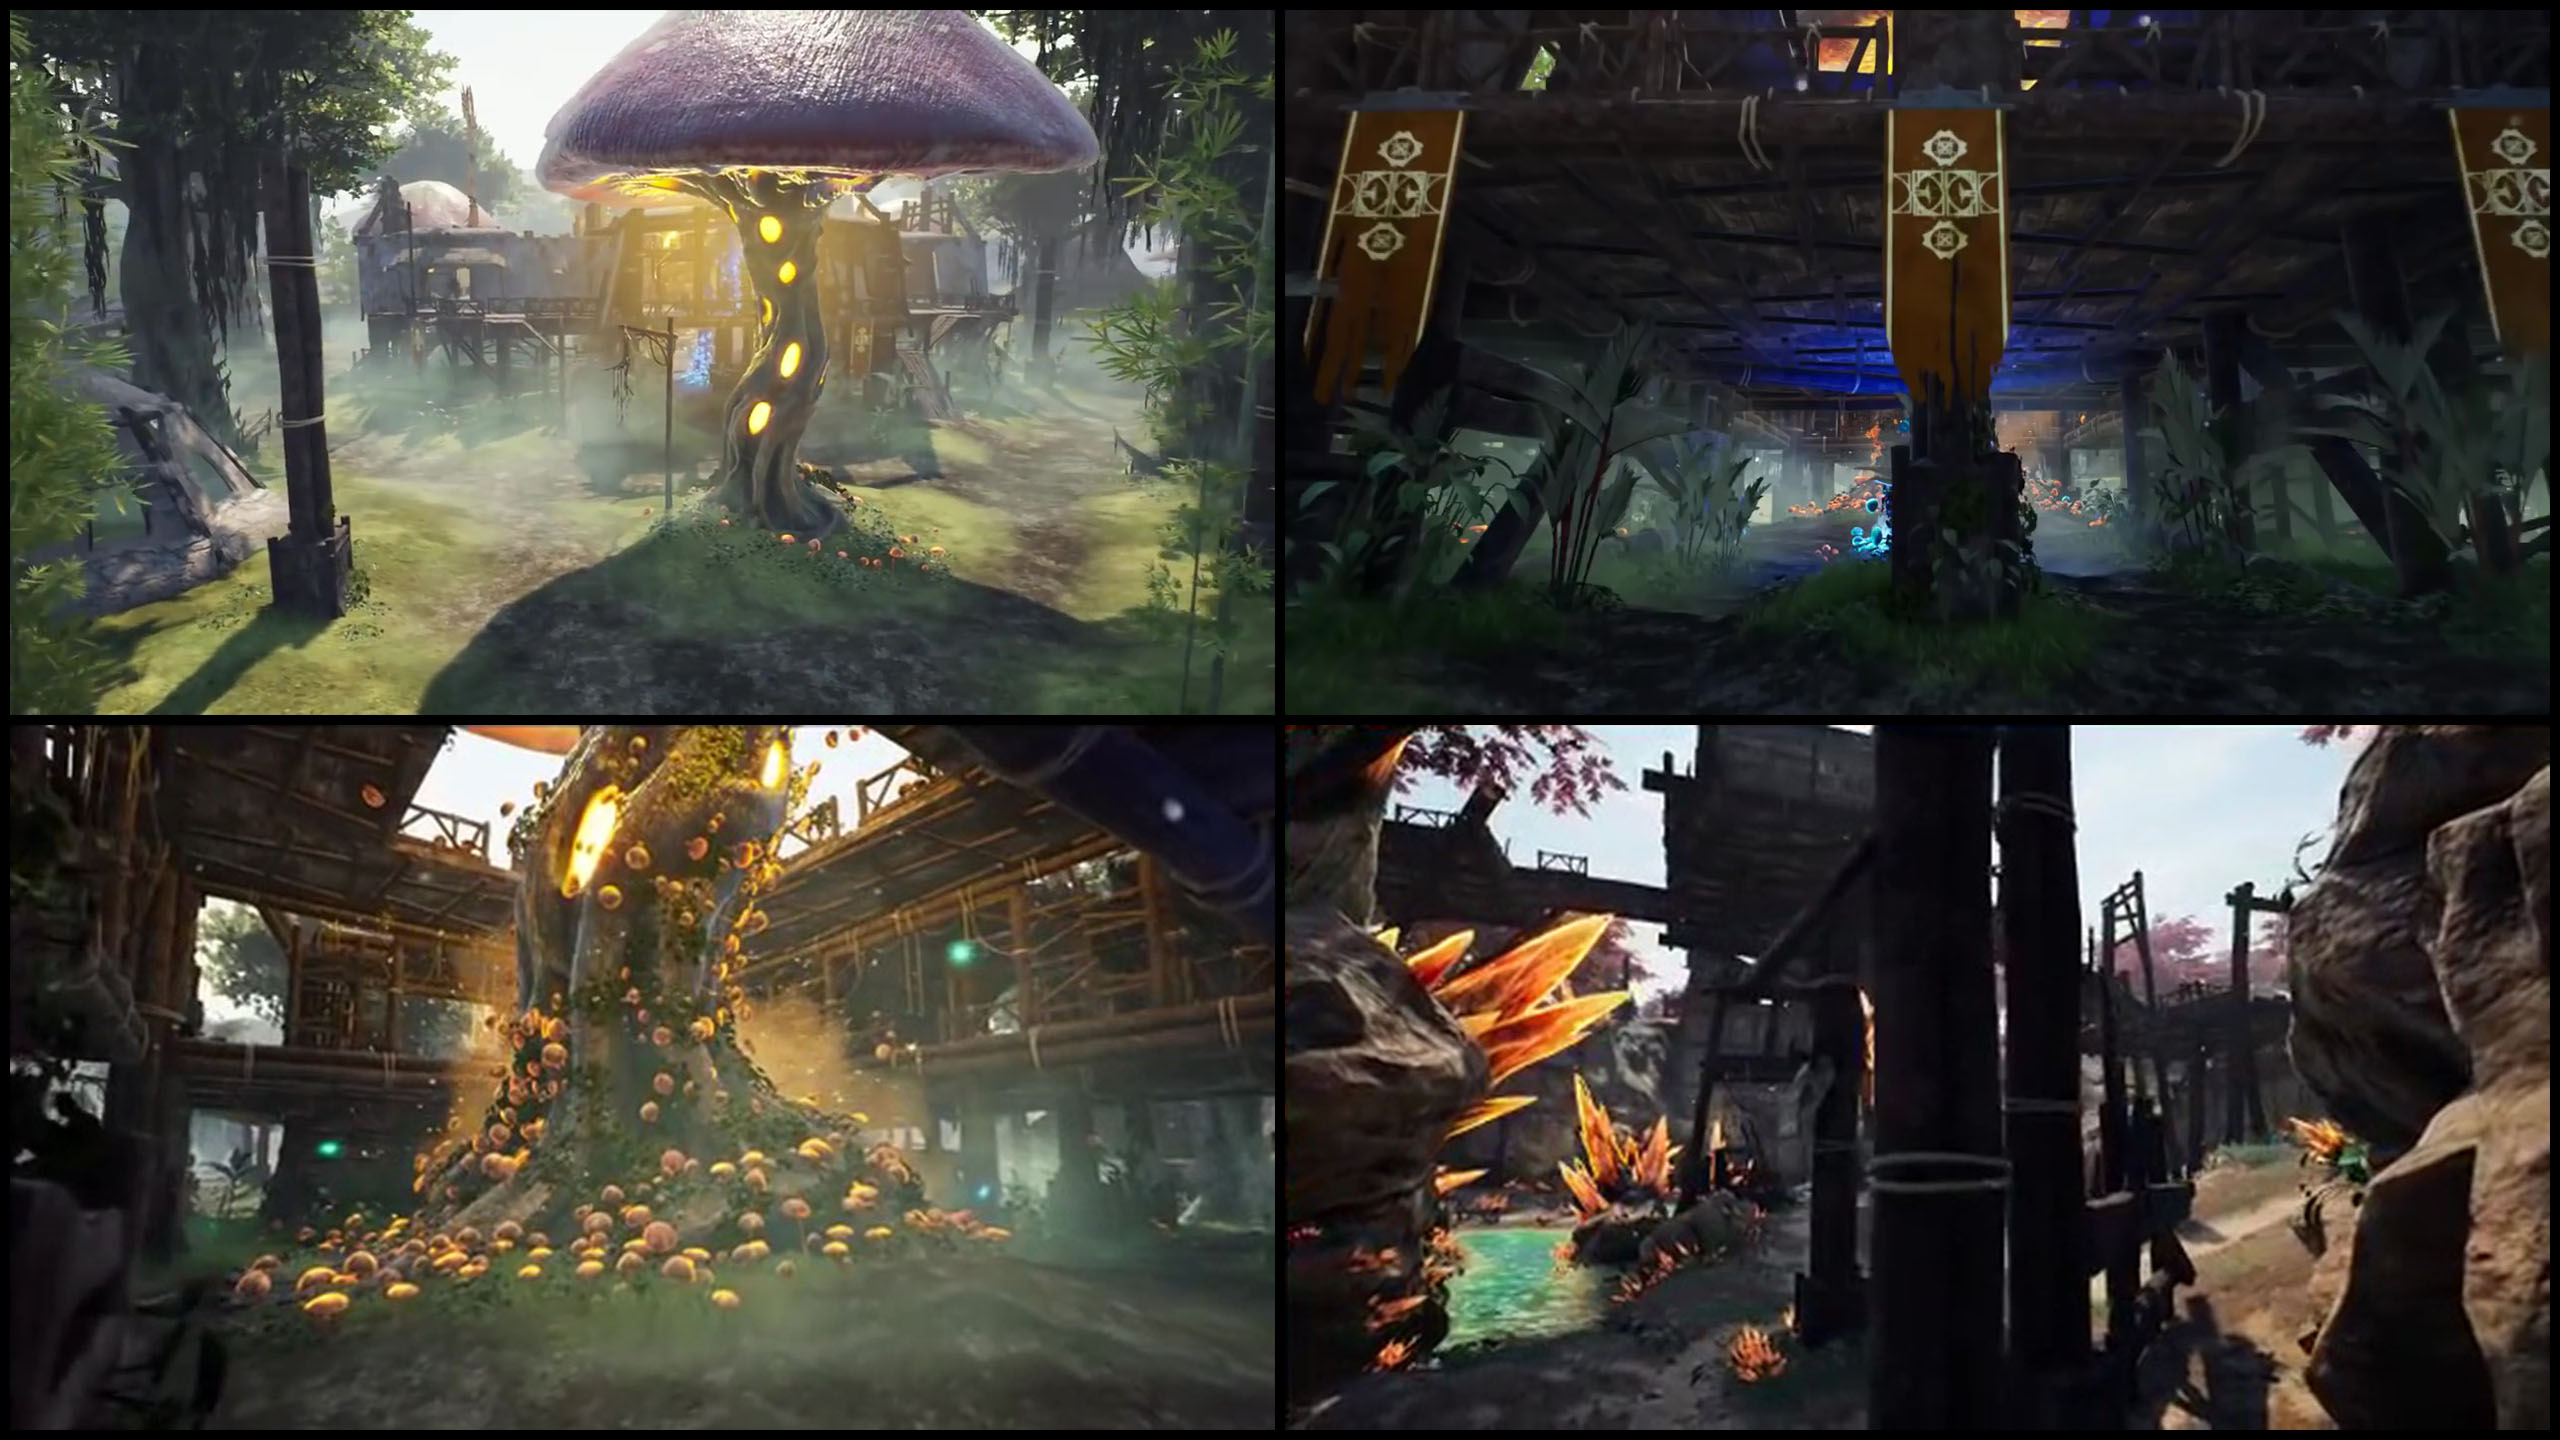
    • Picture two leads us to another location only else visible in the aforementioned scene: The impressive mushroom forest.
    • The orc village settled between those huge mushrooms shows the exact same housings as the one in the orange lands and its exact position is just as unclear. The mushroom forest isn’t that wide though, so it’s safe to put it somewhere there.
    • The wooden head in pictures three and four is another fascinating sight especially with it’s little blazing companion. There seems to be some hewn stone to the right, but the mist is not helping recognizing anything.
    • There’s two things that make me believe the head and the pictures featured in the next segment are not to be found in the exact same swamp area as the mushroom forest. First thing is the missing bamboo, second the differing color of the wisps. While they’re bluish in the two upper pictures which safely feature locations not too far away from the ocean, they are golden in all the other pictures which might put those further inland.

    The Swamps

    [Scene 03 (0:15), Scene 04 (0:17), Scene 21 (1:19)]
    • This big area is rather uncharted and I couldn’t localize any of the shown sceneries. Two reasons may be the gloomy spike trees that take a lot of view from what’s behind them and the haze that drastically limits our sight. Another one is what we could anticipate from Scene 23 and Scene 43: The swamps are surrounded by higher terrain. No matter where you’re looking, the hills by the ocean, the farmland, the volcanic spires and most certainly the wall and sequoia forests stand higher than the swamps, making it difficult to catch a glimpse from outside or a good view from inside of them. Nevertheless the pictures show several buildings and structures in the swamp itself.
    • Admittedly most of them are hardly recognizable in the first one. The most prominent is the jetty in the middle which houses two tents.
    • If you look real closely you can see another one of those tents in the left middle placed on a small hill.
    • On the very left we see a wooden structure which is just as indefinable as the brighter part of whatever stands close to it. The triangle shaped wood carvings could remind us of elements we saw in some Empyrean and Kaelar buildings, but that’s pure speculation.
    • The second picture at least takes us a bit closer to the jetty, the right of both tents now clearly visible.
    • Just behind it we see another allegedly Pyrian house with green roof. If it’s the one we found standing in the swamps in Scene 43 is impossible to tell.
    • A more obvious Aela building is standing at the left. It’s protected by a stone wall at least to the side of the swamp and at both its ends stand what looks like watch towers. It’s the first time we encounter that kind of safety measures meaning the swamps could be a dangerous area.
    • The last picture shows a nice little waterfall and yet another type of building that looks Pyrian.
    • In the back the spiky swamp trees make place for some sequoias allowing at least for a vague placement of that building.
    • As the mosquitoes nearly sucked us dry let’s leave for some friendlier place in the vicinity.

    The Farm & The Volcanic Spires

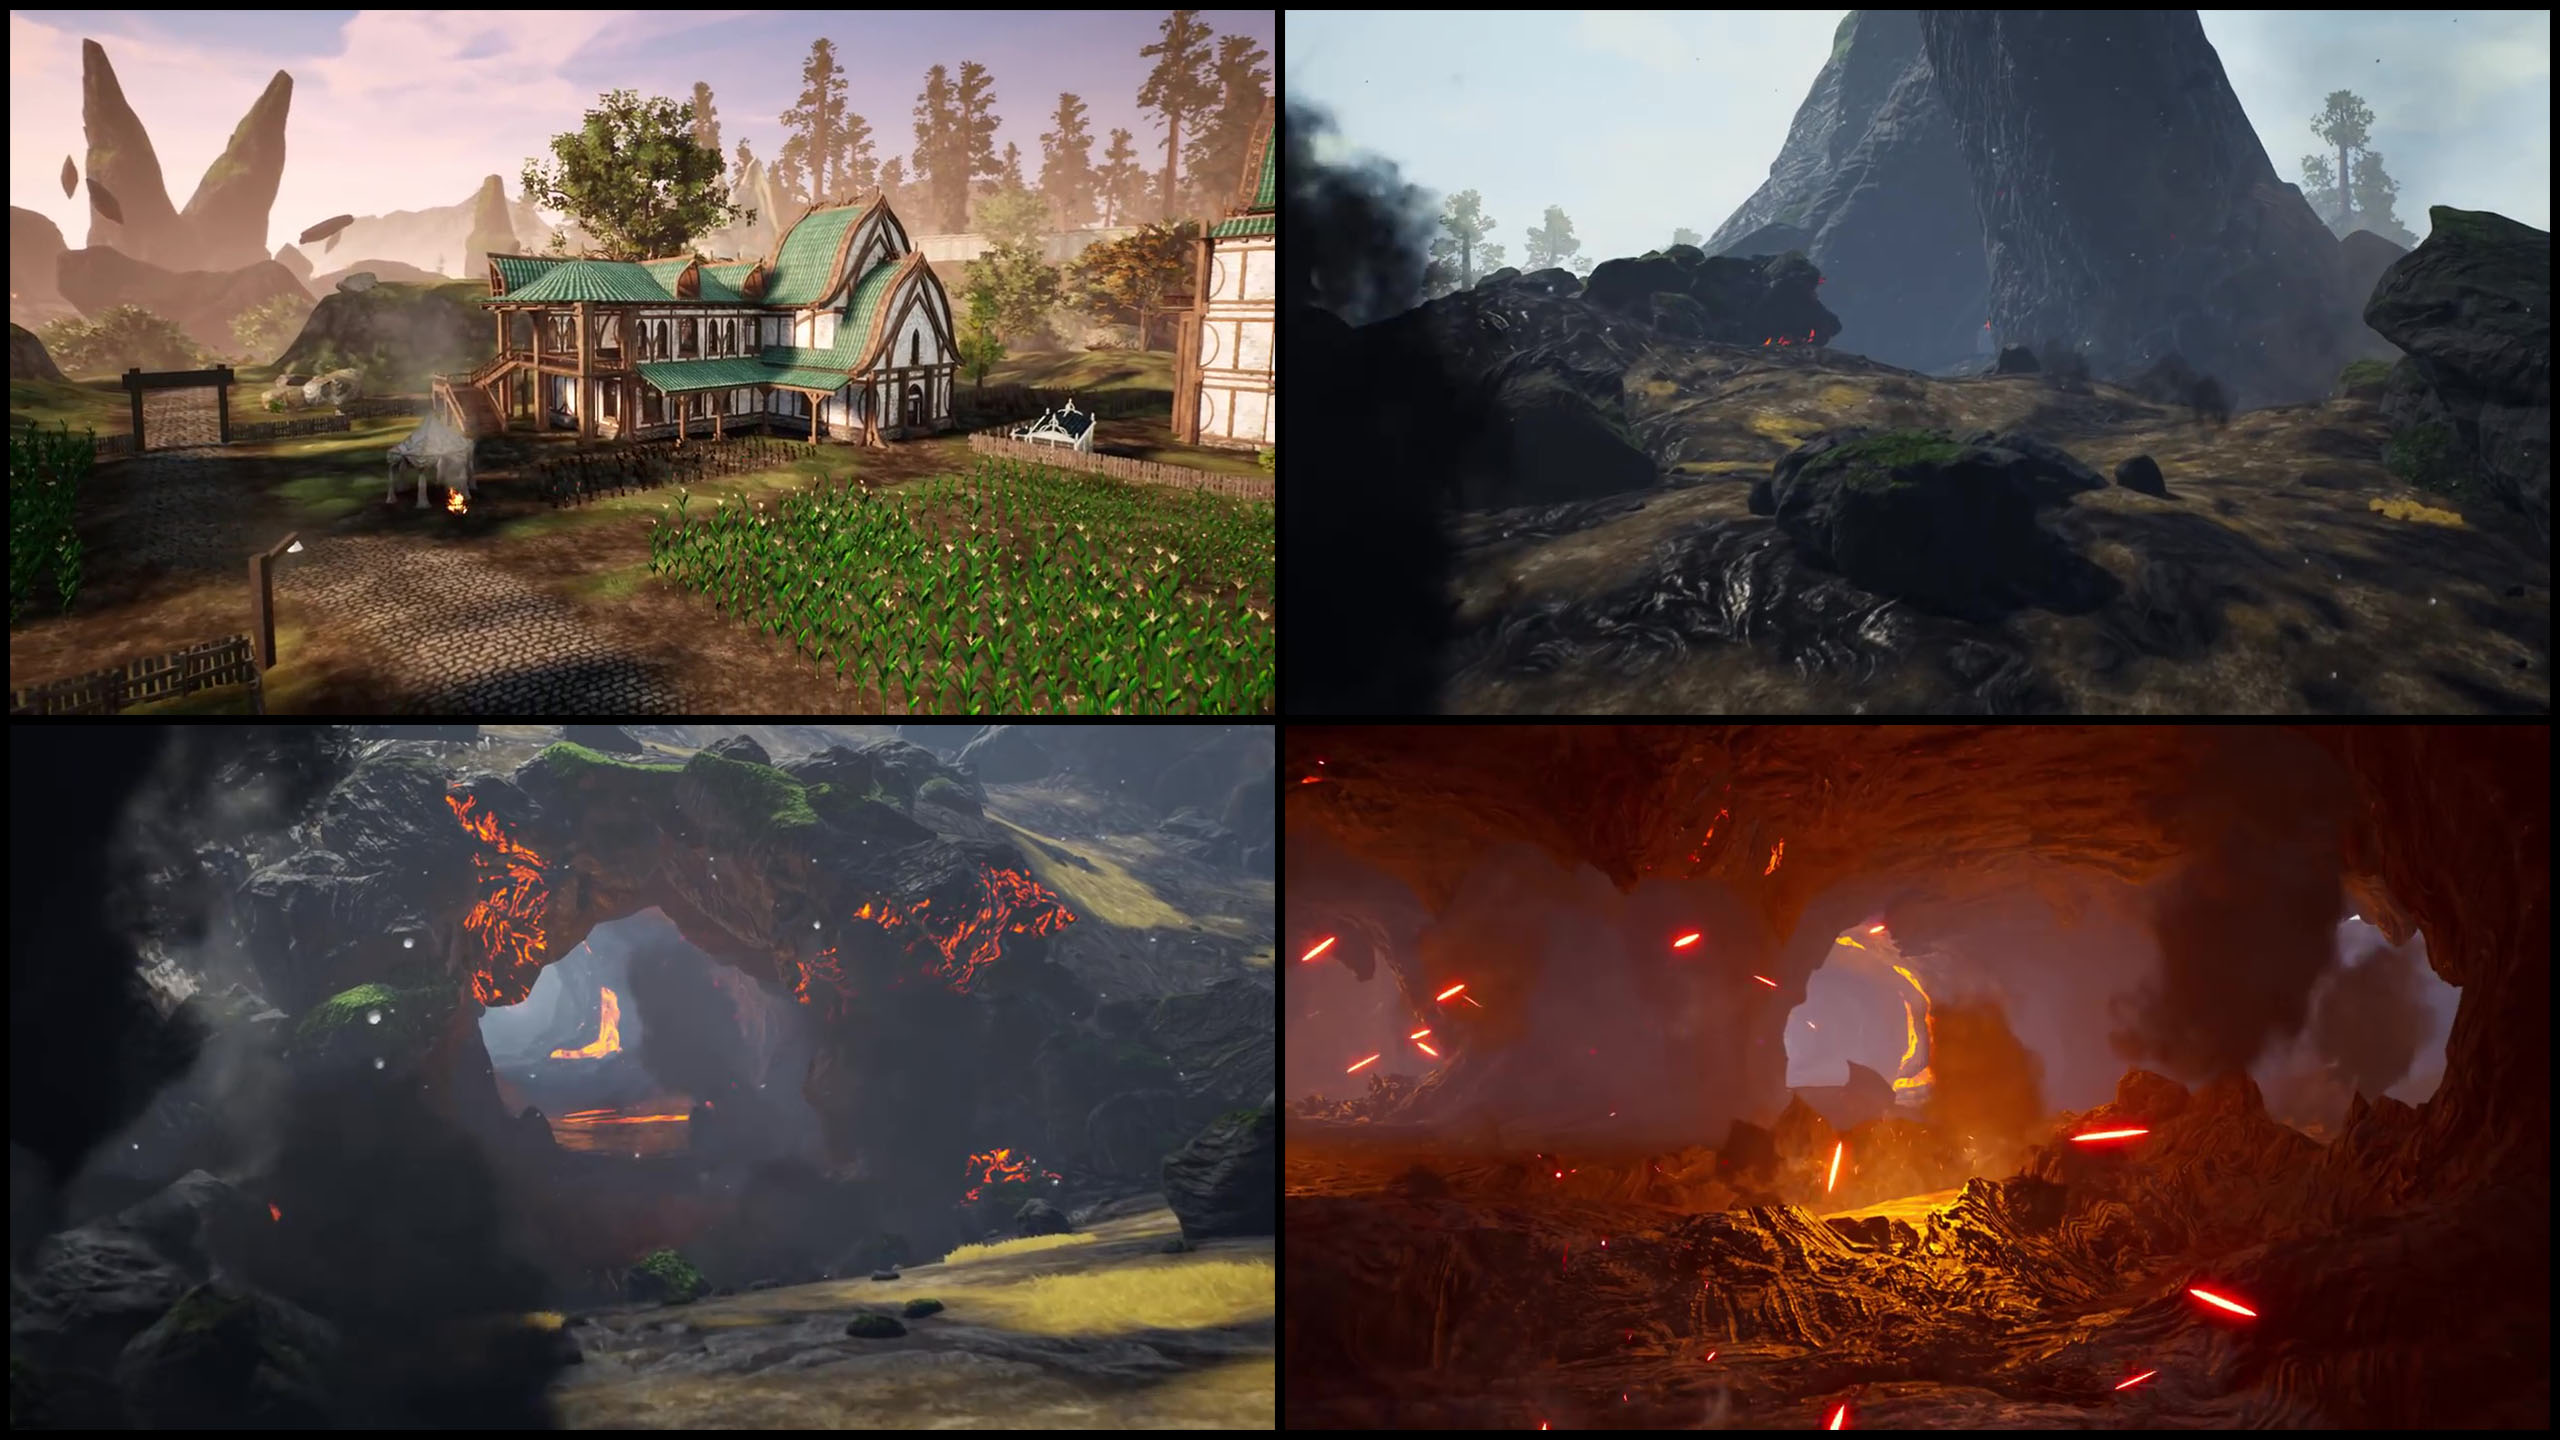
    [Scene 12 (0:43), Scene 39 (2:05), Scene 31 (1:49), Scene 32 (1:51)]

    • While the volcanic spires in the back of the first picture might not look that inviting, the farm in the foreground does. We can only see two of the buildings that should be Pyrian again, yet Scene 23 and Scene 43 showed us some more buildings standing at our back.
    • After being mentioned several times now you see at last why I called this the farm. There’s fields and patches all over the place and that’s just the small part we’re able to see.
    • The tent next to the brazier is of the same kind that we saw on the jetty in the swamp where there was also a Pyrian house with green roof in its background. Considering the way at the left that leads towards the spires heads right into the swamps, the jetty could be just down the slope.
    • Knowing from Scene 43 that there’s also swamp between the farm and the wall it’s easy to see how the terrain behind the buildings drops down there.
    • Just to steeply ascend towards the wall and the angel that’s partly hidden behind a tree. Though you can’t see it in this picture Scene 12 shows how it looks just like the one at the Pyrian lake village in Scene 18. Kneeling and presumably holding a candle.
    • As this is one of the few scenes facing in this general direction it is noteworthy that the mountains behind the sequoias and the spires are not as high and more flat than the ones on the other side of the map. There also seems to be no snow.
    • The volcanic spires are so massive, they look much closer than they we’re shown to be in Scene 23. What could have also been anticipated from that scene are the floating fragments and one spire that separates from the rest where it damaged the wall. For more ‘details’ regarding this site you might want to read this story (Dillia’s Diary) and take a closer look at the last picture.
    • Although we’re well-advised to better stay away from the spires we’re getting closer in the second and third picture. What could be a little surprise is the moss growing on the volcanic ground and in hindsight on the spires, too. That means whatever happened here, happened some or even a long time ago (read the aforementioned story!).
    • Nevertheless smoke is still emerging from the ground and while we still enter the caves below in the last picture, its inferno reveals. The lava caves and fire sparks make for a fervid spectacle, but the unbearable heat forces us out of the caves in no time. Time for some cooling.

    The Sequoia Forests

    [Screenshot 5, Scene 05 (0:20), Scene 06 (0:21), Scene 16 (0:59)]

    • Rushing out of the cave and uphill through one of the breaches in the wall we reach the shady sequoia forests.
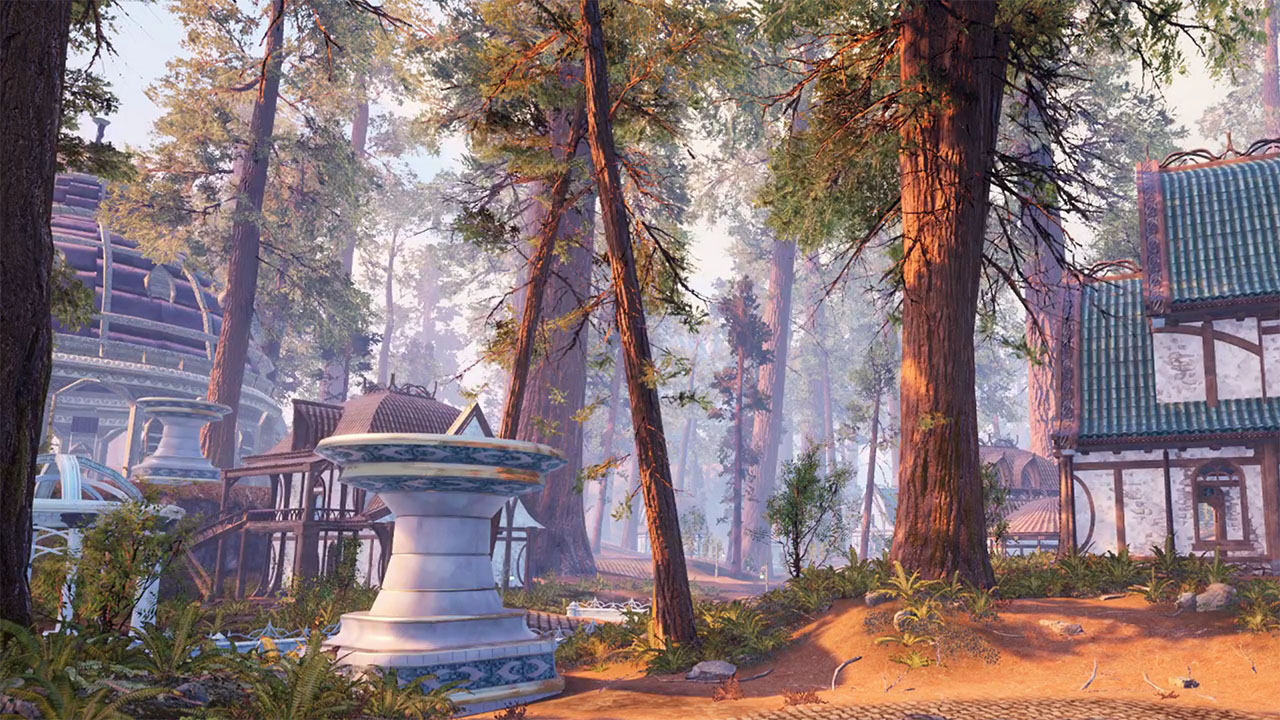
    • There we might stumble across the Pyrian village shown in the first picture. It may be due to the fact that this was one of the screenshots that for the first time we see marble buildings and accessories that could be Empyrean style.
    • The rest of the more usual houses is scattered between the high sequoias that give no view for a precise placement of the village.
    • As we keep exploring the forest we encounter another Kaivek village in the last three pictures. After the ones in the orange lands and the swamps that is the third of them featuring again the same building types.
    • The first two pictures differ only slightly in angle. The round hut of the second picture is shown behind the right hut of the first picture at the end of Scene 05 The ones uphill are just the same in both pictures. Figuring out the third picture too belonged in that village, needed some shadow comparison on the front of the triangle shaped hut in the left. As these matched, the whole village is obviously standing near the river shown in the third picture.
    • Looking at the horizon we only see cliffs but no high mountains. In combination with only one river on the map that we know of, it seems likely that we’re actually standing somewhere upstream from the Py’rai lake village. So that’s where I put this quaint place.
    • Considering the water is coming from where we only see cliffs I’d expect there to be a beautiful waterfall behind those houses. Maybe Intrepid hid that from us to discover when Alpha 1 starts.

    Twitch Stream 2018-08-17 (58:57)

    • The first preview video did not take us that close to the coast thus it’s the first time we can take a closer look at the beach.
    • The houses of the fishing village are the same that we already saw in the orange lands, the mushroom swamp and the sequoia forest though there seem to be some buildings that we haven’t seen before. If nothing else, the horned tower in the middle of the village should make it another Kaivek settling.
    • The placement of the village on the map is easy to figure out as the first and third picture show it near the mushroom swamp.
    • Thanks to incredible progress in Alpha 1 development towers don’t seem to be invisible anymore. The first picture shows both the lighthouse (top right) and the Aela tower (middle top).
    • The last two pictures reveal two stone walls behind the village that form an inland passage which may lead directly to the Kaivek settlement in the mushroom swamp.
    • In the top right corner of the last picture you can already see the hills that will limit the map in this direction.

    Twitch Stream 2018-08-17 (58:57)

    • One of the other locations is a sizeable wooden construction that is built around a huge orange glowing mushroom. As there’s more mushrooms around, it’s certainly placed in the mushroom swamp.
    • The other spot is only visible in one scene, but is obviously located in the orange lands as we see orange crystals and pink trees. The ground though isn’t orange, but rocky and together with the different terrain levels and wooden structures it looks much like a mining site.
    • This concludes our journey through Verra’s Alpha 1. I hope you enjoyed it and were able to gain some more insight into the various sceneries.

    In the spectacular Alpha 1 – First Look at Action Combat Video both of the latter locations are arena-like showplaces for the upcoming action combat system. The video also features the castle and a city setting that is definitely connected to this screenshot and has nothing to do with the town we already know. As the video is fast-paced it doesn’t allow for a precise localization of the settings on the map, yet it gives a good impression of their immediate surroundings.

    This concludes c0ug4r’s Alpha One Map Analysis. You can find their forum profile here: c0ug4r
    Those interested can find c0ug4r’s original post on the Ashes of Creation forums here.